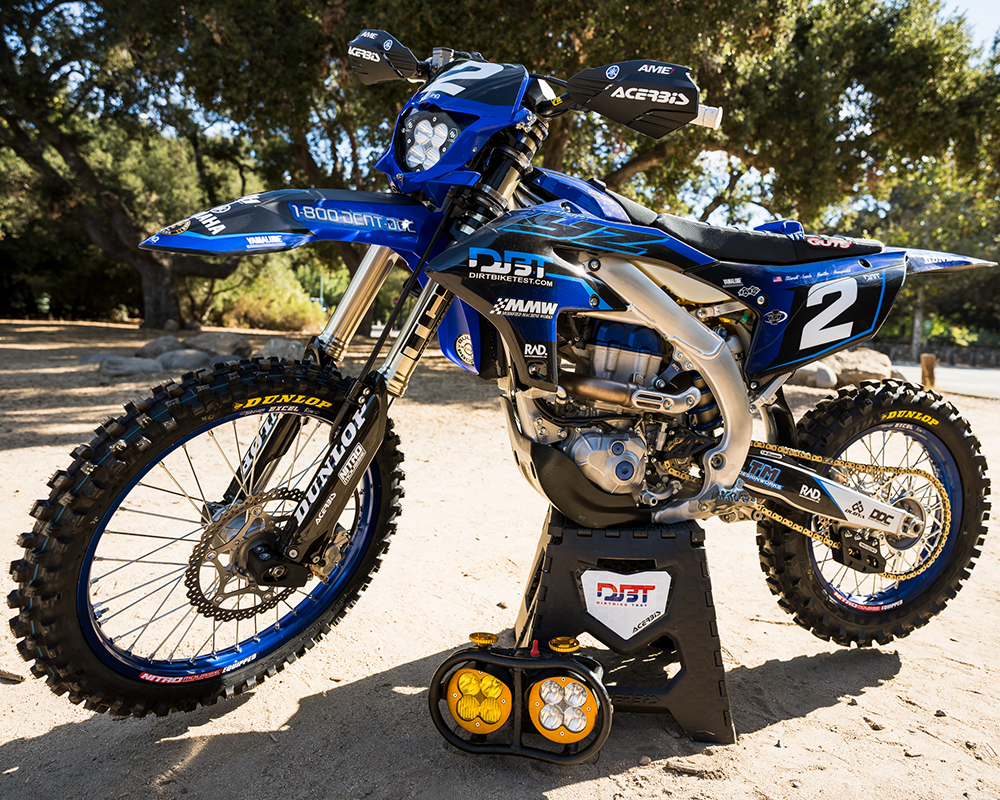
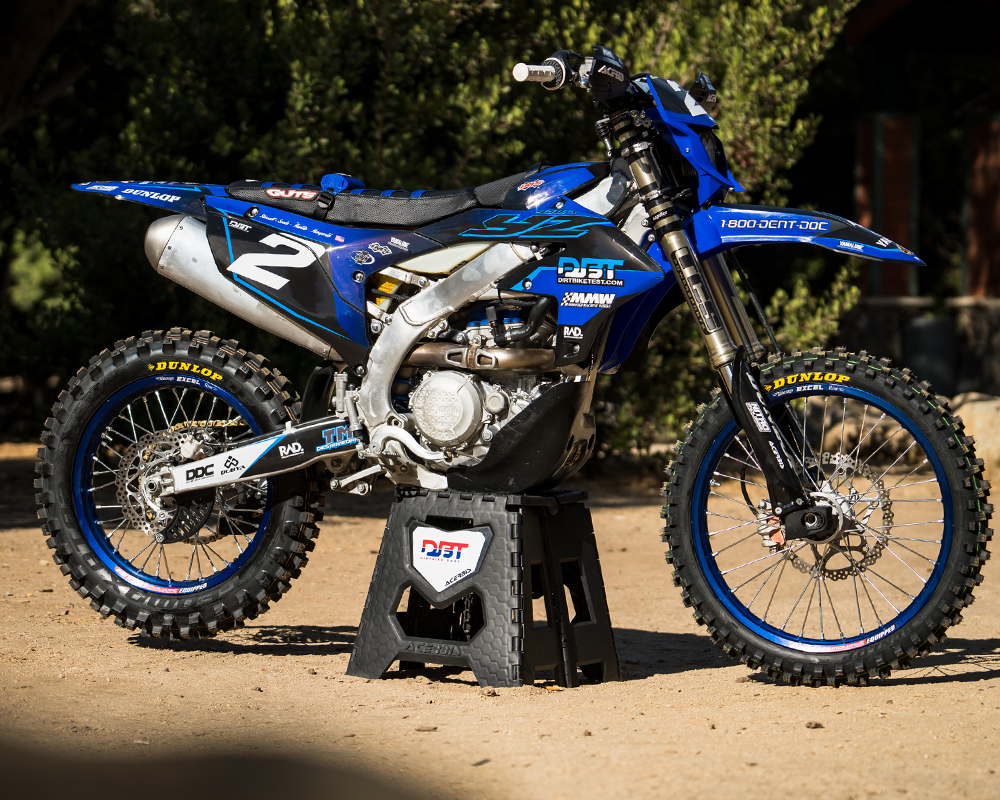
Taming The Beast
Story and Photos by Trevor Hunter
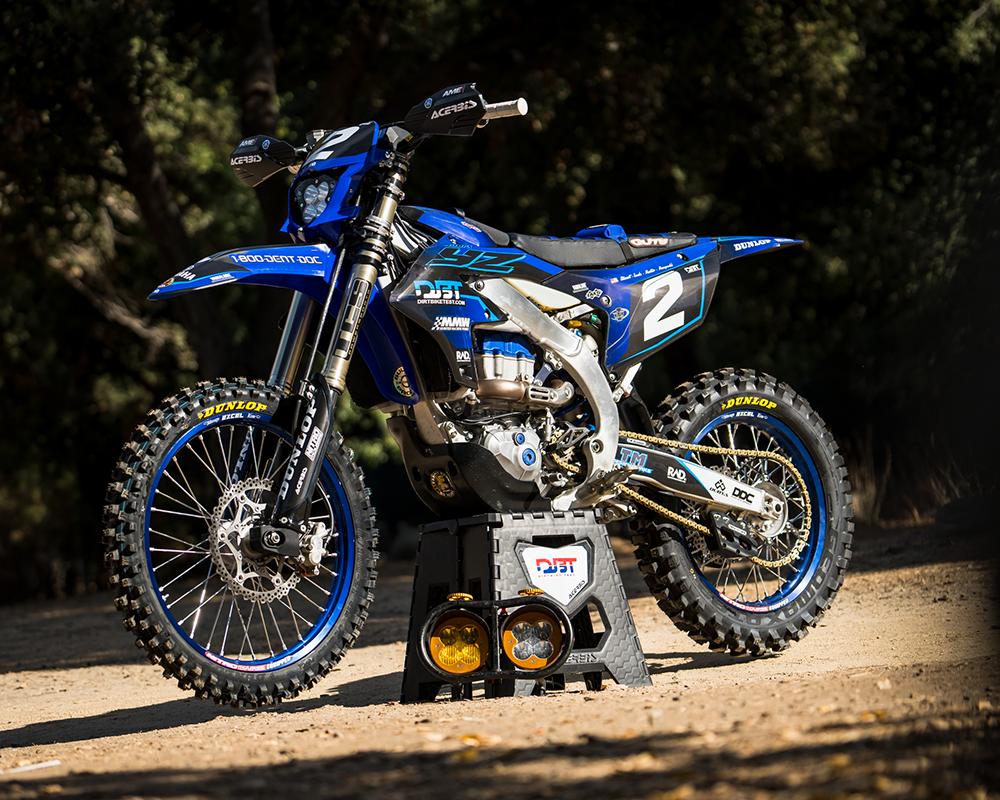
Like Thanksgiving dinner or Christmas morning, we enthusiastically look forward to the annual 24 Hours of Glen Helen every year. Despite all of the reasons that we shouldn’t enjoy it like the lack of sleep, dehydration and starvation, and all of the work entailed both pre- and post-race, we just can’t stay away from it. As we have the last couple of years, we head to the race with one goal in mind – to win the damn thing. And to give ourselves the best shot at that, we take what we feel is the best bike for the job. From 2021-2023, we took the now previous generation YZ450FX and brought home a win in 2021 and 2nd Overall in 2023. You can read about the 2021 build HERE, the 2022 build HERE, and the 2023 build HERE, but Yamaha completely revamped the big-bore FX racer for 2024 and we were left with a new challenge — build the best new gen YZ450FX we could to go win the 25th annual 24 Hours of Glen Helen.
In stock trim, the new bike has a lot of positive traits and potential. It’s slimmer, lighter feeling, and has all of the power you could want out of a 450cc engine. However, in our time with it stock (which lasted quite a few months before making any significant changes), there were a few areas we felt could use some improvement. Most notably, the front end of the bike was our biggest “concern” when modifying this machine. In short, we struggled with a lot of feedback and at times some harsh feelings through the front of the bike, and under heavy loads it’d feel twitchy and nervous.
After a few months and several races in stock trim, we felt maxxed out with the stock suspension and TCS Powersports gave us a revalve and respring using the stock components. In years past, we’d shorten the shock 3mm internally, but for 2024 Yamaha did this on their own to lower the seat height by 10mm. They also shortened the front forks by 10mm to equally lower the entire bike. As a result, we left the shock length alone and stuck to valving and springs. For our 165lb Pro level riders, we run .50 fork springs and initially started with a 5.7 closed end shock spring. To read about why we went with a closed end spring rather than the stock open ended spring, click HERE.
To improve the stock suspension, we were able to get a more supple feel initially in the fork while increasing hold up to not get as deep in the stroke under heavy loads and eliminate that previously mentioned nervous feeling. Likewise, out back we increased hold up and felt better control with the revalved suspension, but we felt a decrease in initial bump comfort and compliance under light acceleration and through ruts. To combat this, we went up to a 6.0 shock spring to allow us to run less preload while maintaining the same sag number, ~8mm of preload with the 6.0 vs 12mm with the 5.7 spring. The result was a softer initial feel that soaked up bumps at slow speeds and light loads much better than before. Overall, both fork and shock settings are drastically stiffer than what we ran in the previous gen bike to compliment the new chassis design.
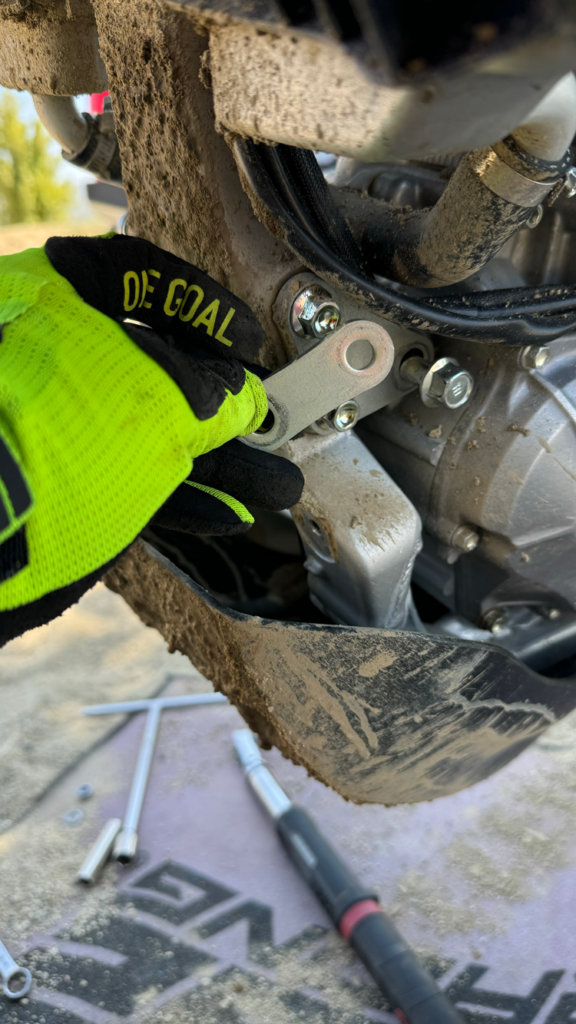
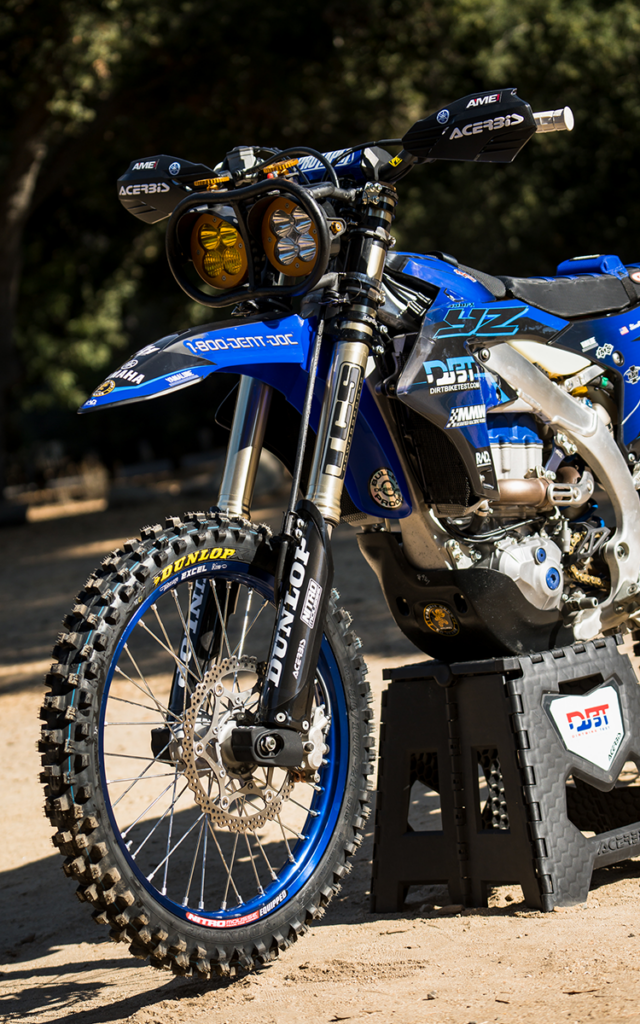
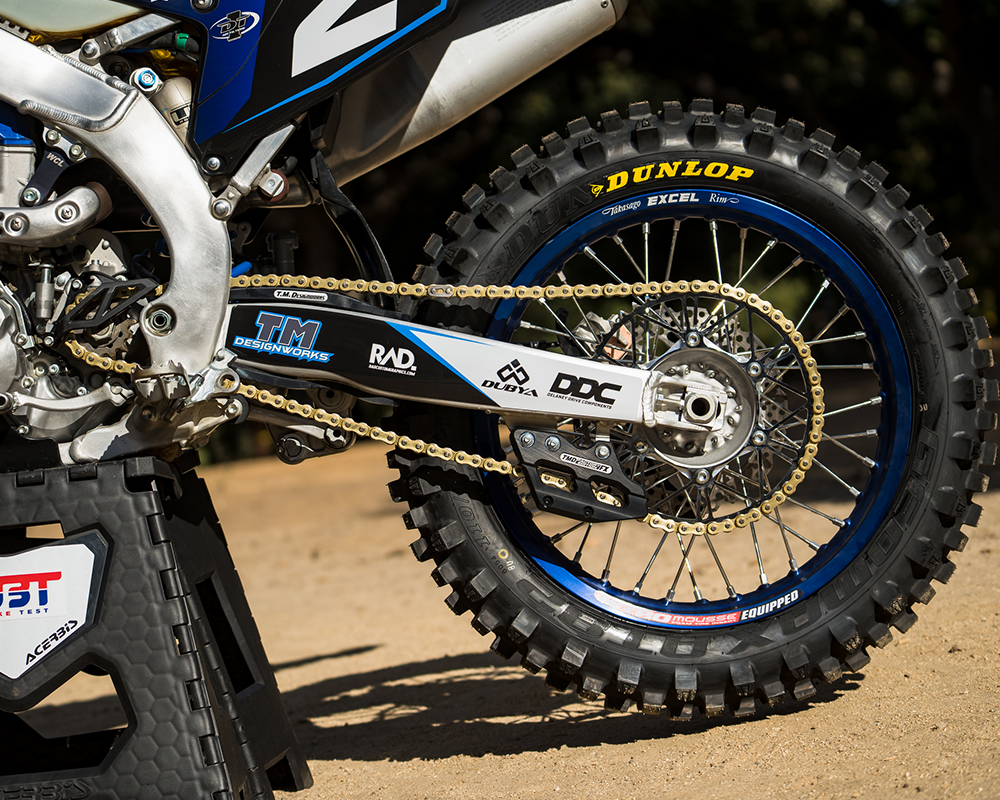
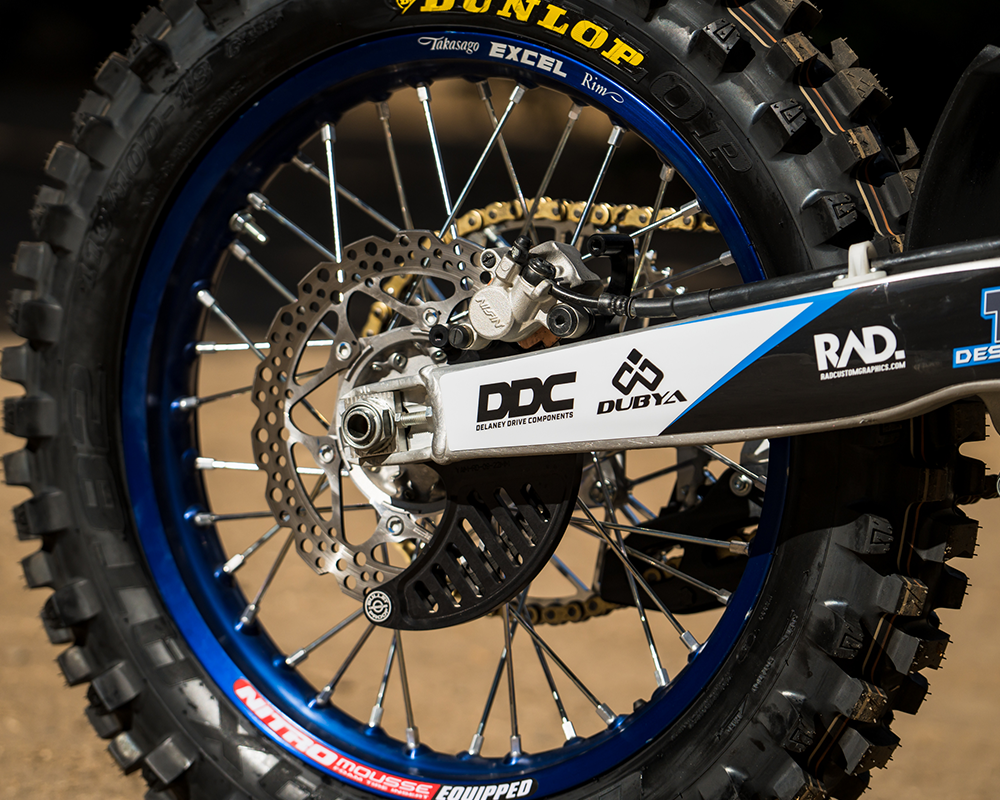
One of the best, and simplest, mods we did to this bike is “modify” the front engine mount. The 450FX comes stock with a solid front mount with an added half plate on the two smaller bolts. By simply removing the outer plates and running YZ450F bolts (which are shorter to accomodate for the missing plate), it completely changed the handling feel of the bike and for the better in our case. It removed a lot of the harshness we were feeling through the front of the bike and added stability at speed. We felt the slightest loss in front end traction and lean angle grip, but it was well worth the added comfort and stability we gained. The “new” engine mounts on the 2025 YZ450F is now this exact setup – the 2024 YZ450FX front mount without the outer plate.

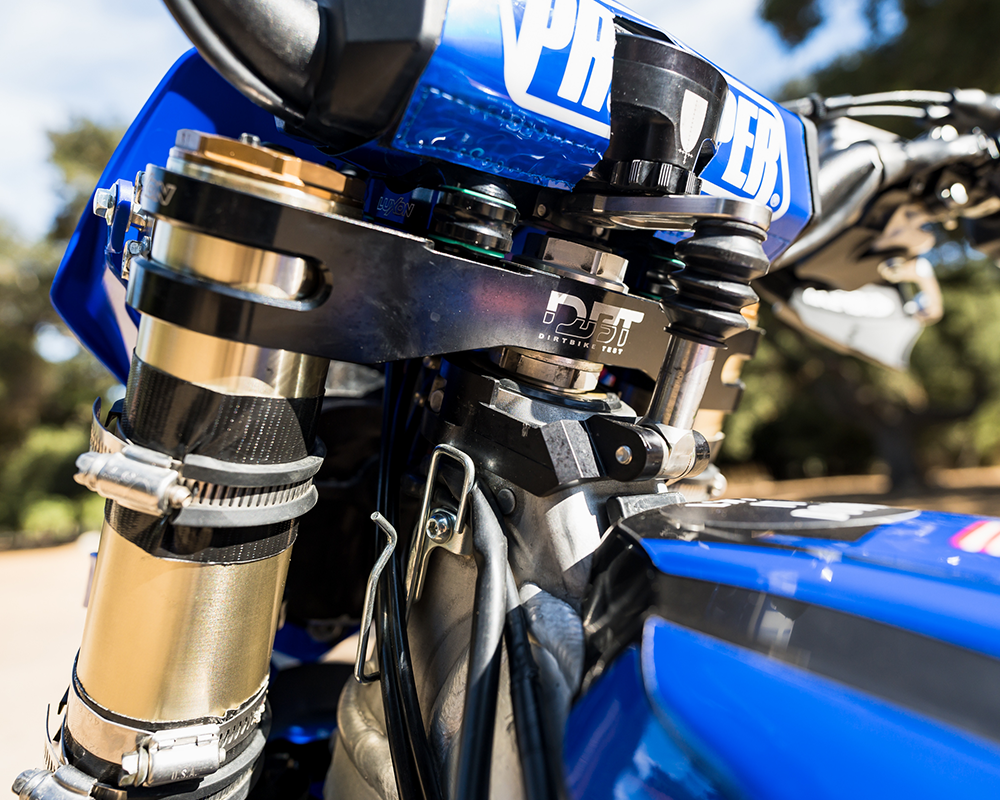
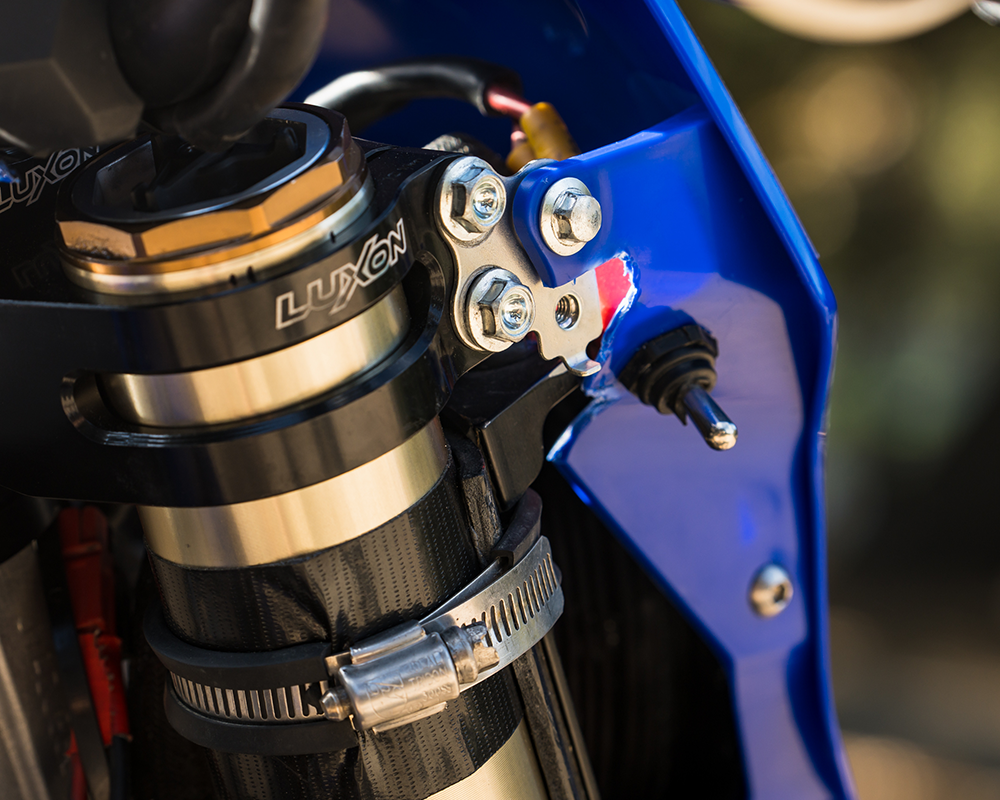
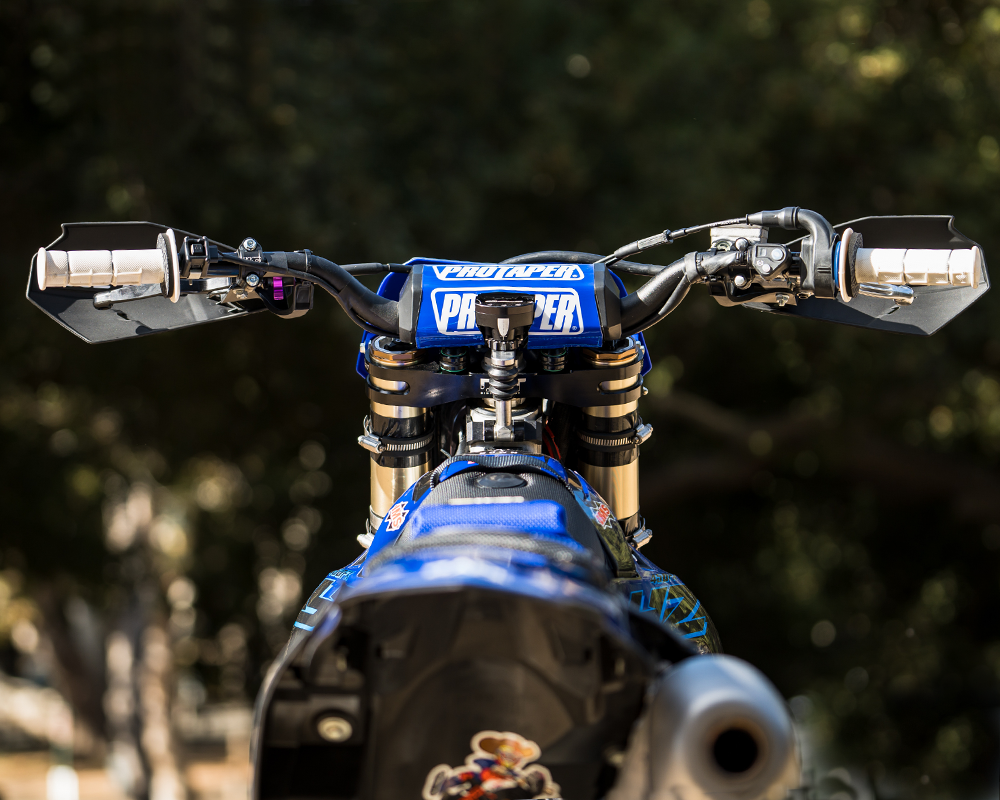
Another big change, and something we need to go back and test against stock again is the Luxon 23.5mm Triple Clamps. The clamps are a different offset from stock (22mm is stock) and provide a much different handling feel. In short, the clamps added a tremendous amount of front end traction, and the biggest positive we felt is the ability to cut across the track, cut down through turns, and just maneuvering the bike in general. Not that we felt the bike was lazy or slow moving beforehand, but the clamps really allowed us to move the bike effortlessly and with precision. Stability wasn’t hurt with the clamps, but we did feel a touch more feedback through the hands with this setup. We ran the green or soft bushings for the race looking for the most comfort for the duration of the event. Further down the road we’ll have a more in-depth review on these clamps, comparing it to stock and to another brand’s offset clamps.
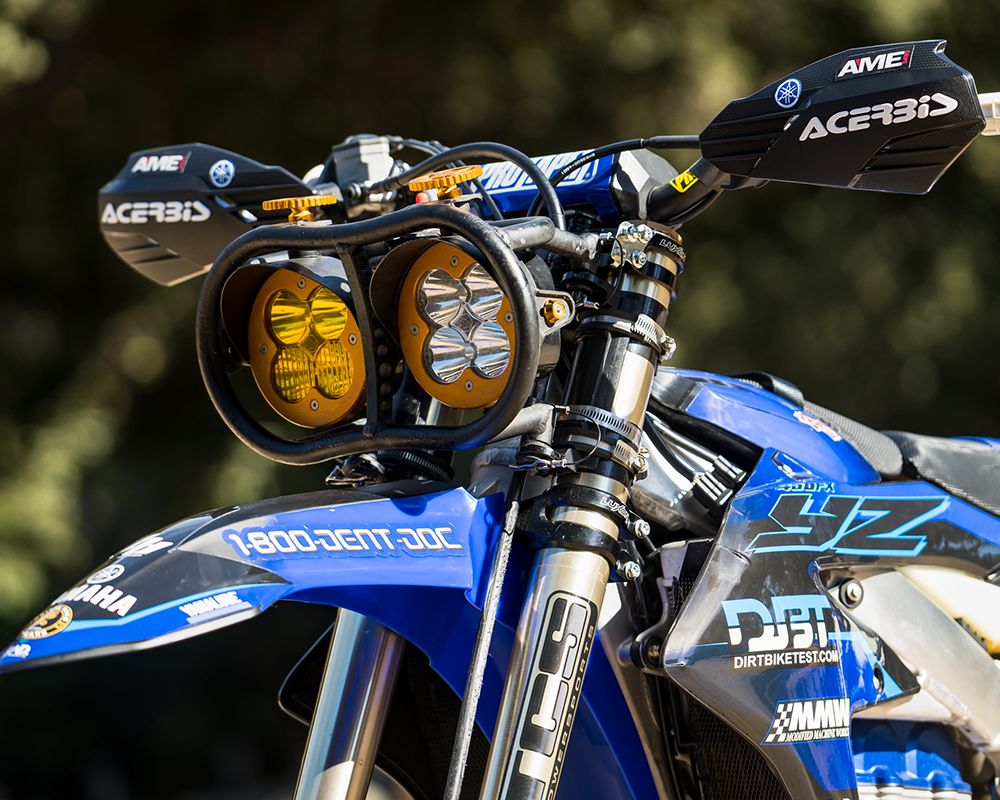
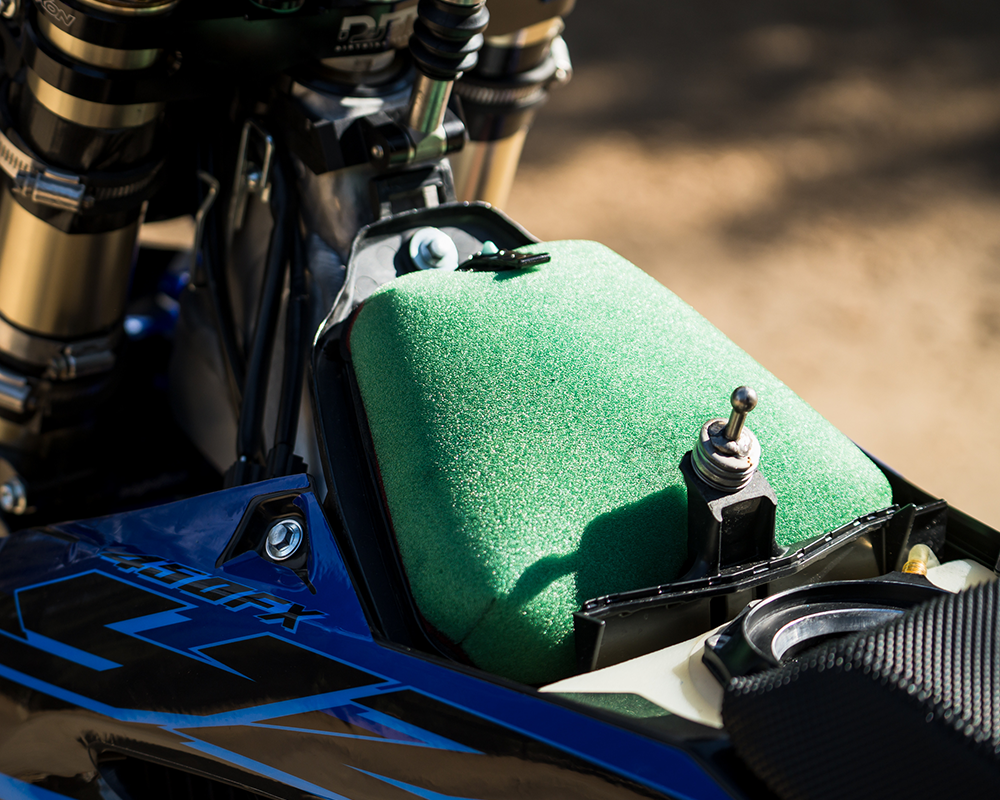
Our light setup is again a Baja Designs XL80/XL Pro combo fitted in a Modfied Machine Works light frame. The XL80 puts out an incredible amount of light with a good spread and far throw, covering all of the bases that you really need at Glen Helen. The XL Pro is setup with an amber combo lens with a little more emphasis on a wider spread than further throw. We use this as we like to turn the XL80 off in the dusty conditions and just rely on the XL Pro with the amber lens to cut through the dust better at slower speeds. Using a 2024 WR450F Stator (Part #: BNK-81410-02-00) and Flywheel (Part #: BNK-81450-00-00), we were able to power the XL80 with no issues, something we couldn’t do on last year’s bike. To power the XL Pro, we used these battery packs which can power the lights for roughly four hours a piece. To read more about powering lights on a bike, check out our Tech Tip articles HERE and HERE.
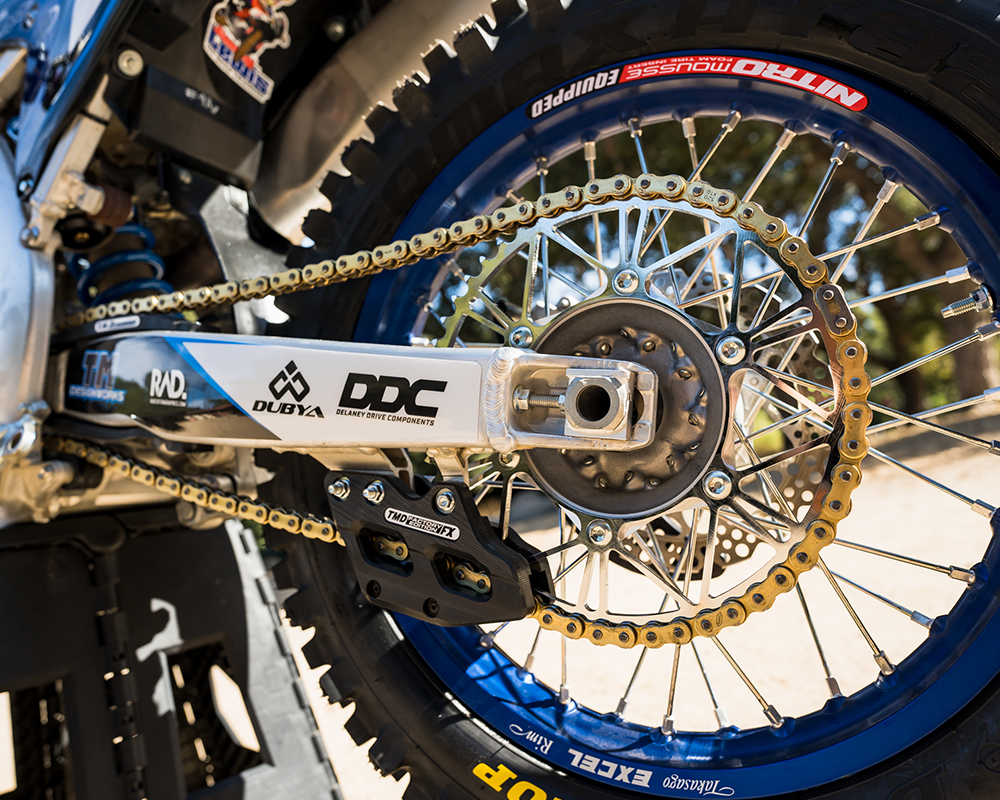
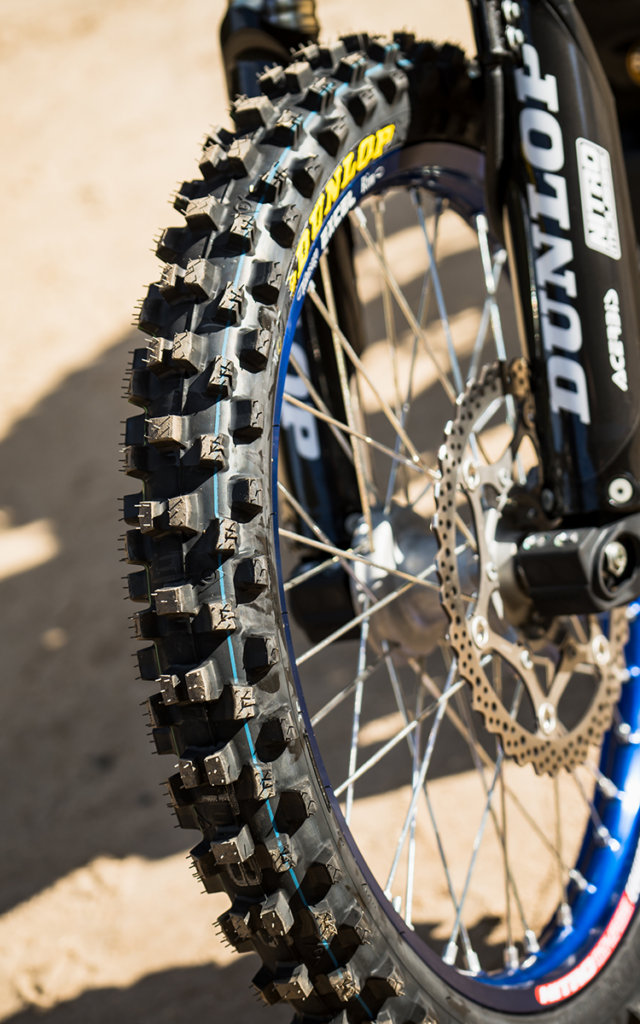
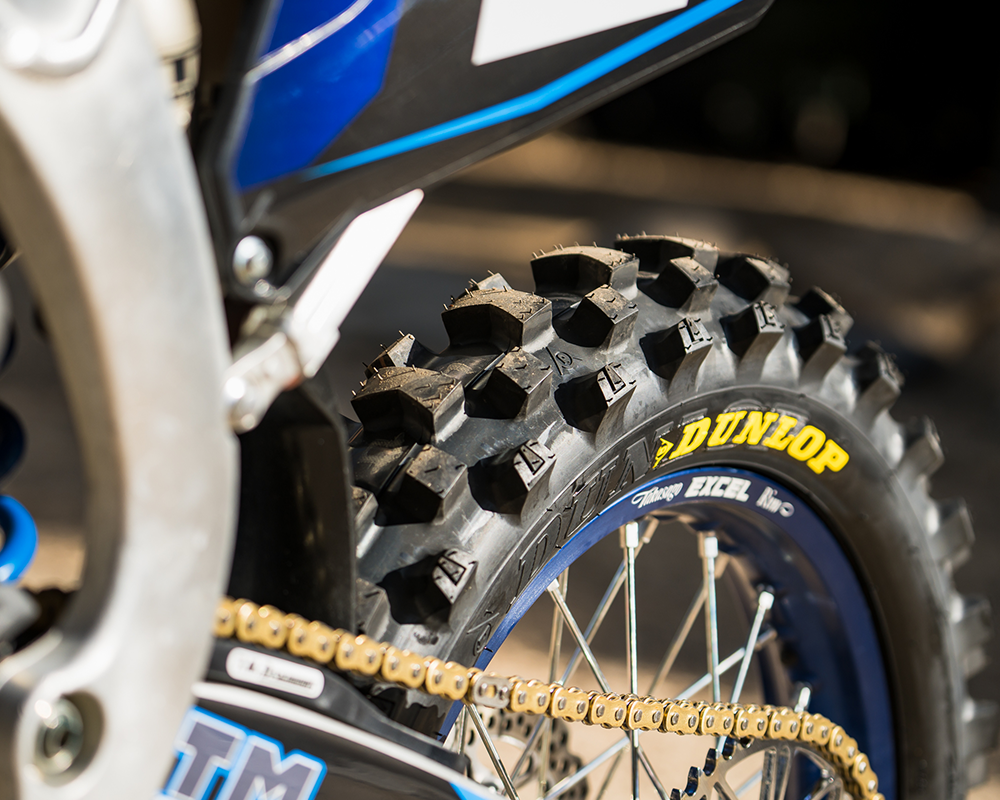
Similar to the old bike, we felt a big benefit in chassis-handling with running a 14/52 gearing setup. Going up on both ends of the sprockets helps lessen the effect of chain torque and frees up the chassis. The result is a calmer, smoother chassis under acceleration that floats across chop and bumps rather than through it. Some of our vet guys and slower riders felt the gearing to be slightly tall and would prefer 14/53 to match their corner speed better. Power delivery is also different with this setup — it’s smoother and longer pulling and overall just easier to ride for a duration of time.
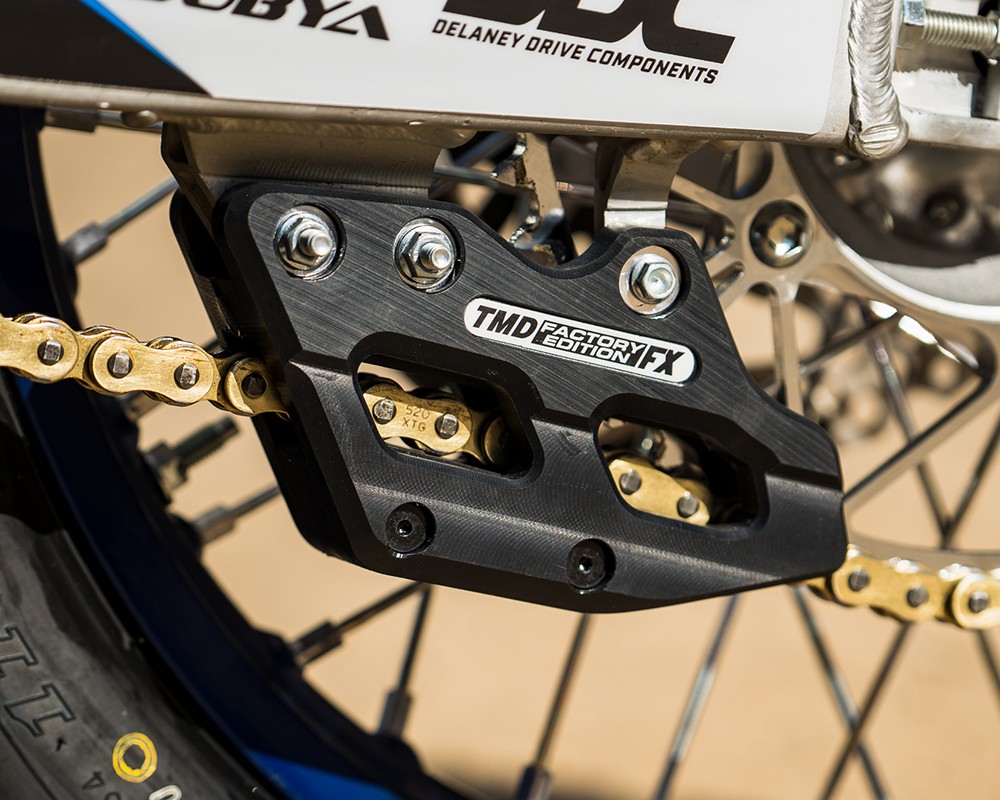
DDC Racing supplied the front and rear sprockets for a setup that will last a lifetime as they offer some of the strongest sprockets we’ve tested to date and are relatively lightweight for a steel option. We ran a Sunstar XTG chain and have always had good luck with this chain for endurance racing with little stretching and good strength.
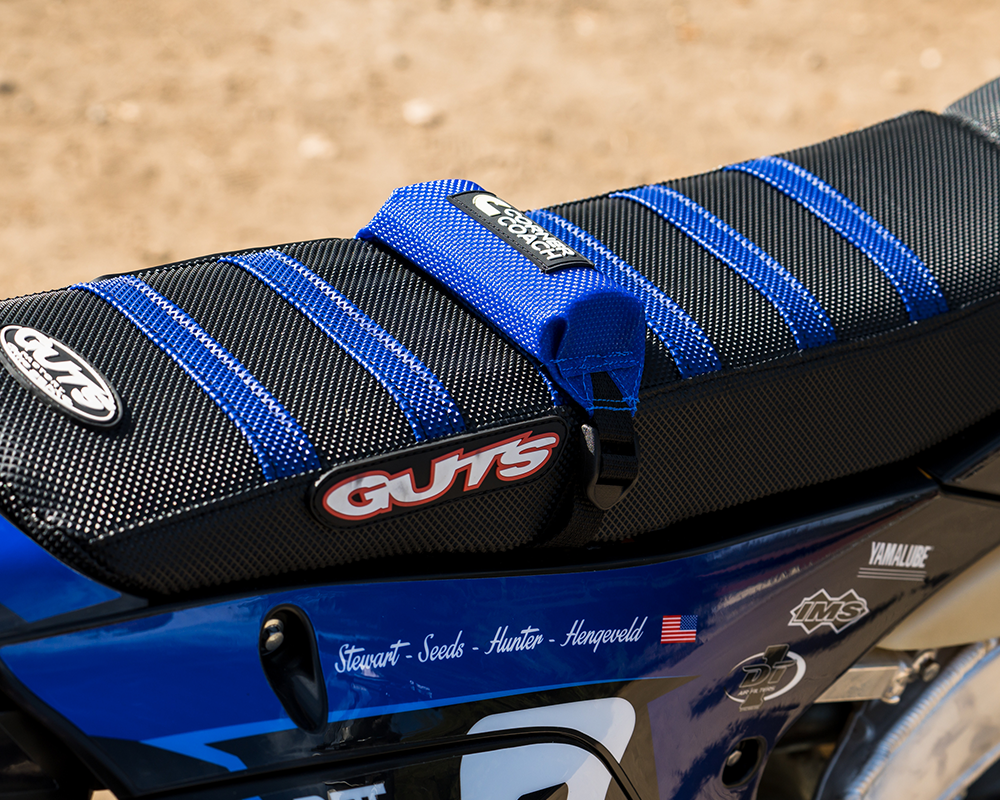
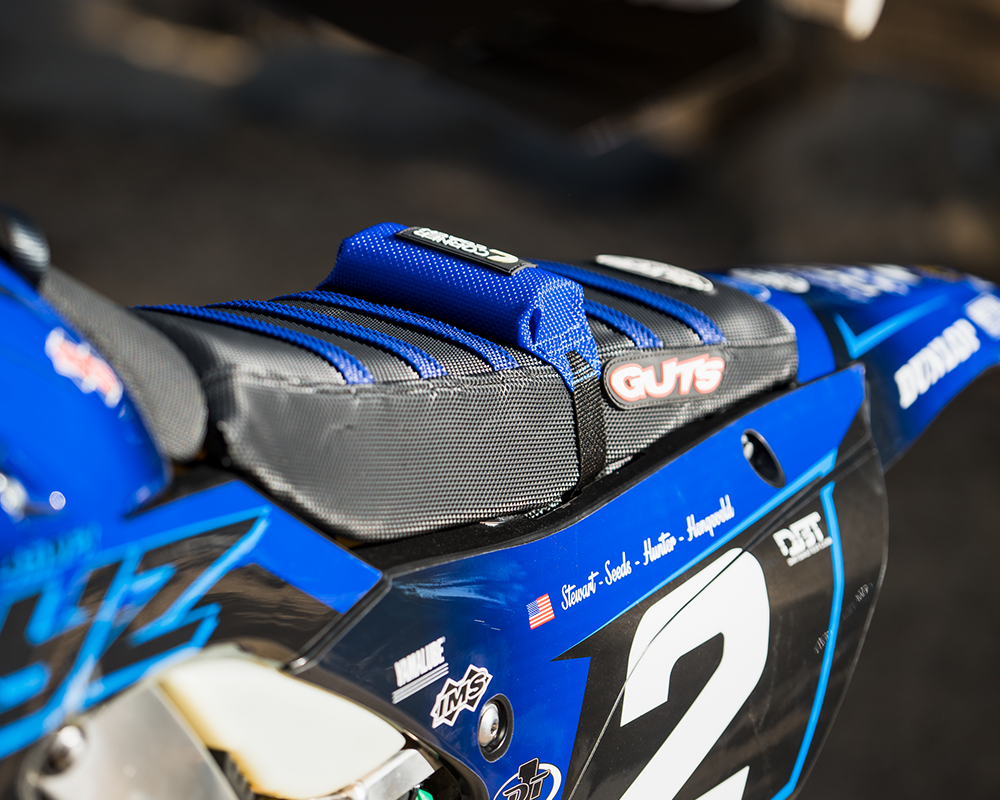
GUTS Racing supplied us with a seat cover and foam, which were for more than just looks. They offer a wide foam which is more similar to the shape of other bikes and the older Yamaha seats rather than the new rounded profile they currently come with. The wide profile foam is just more comfortable and familiar for a lot of our riders, and for a race as long as this, comfort in that area is much needed. Additionally, the added grip from the cover helps us harness all the power this 450cc engine puts out without having to hold on as tightly with our upper body.
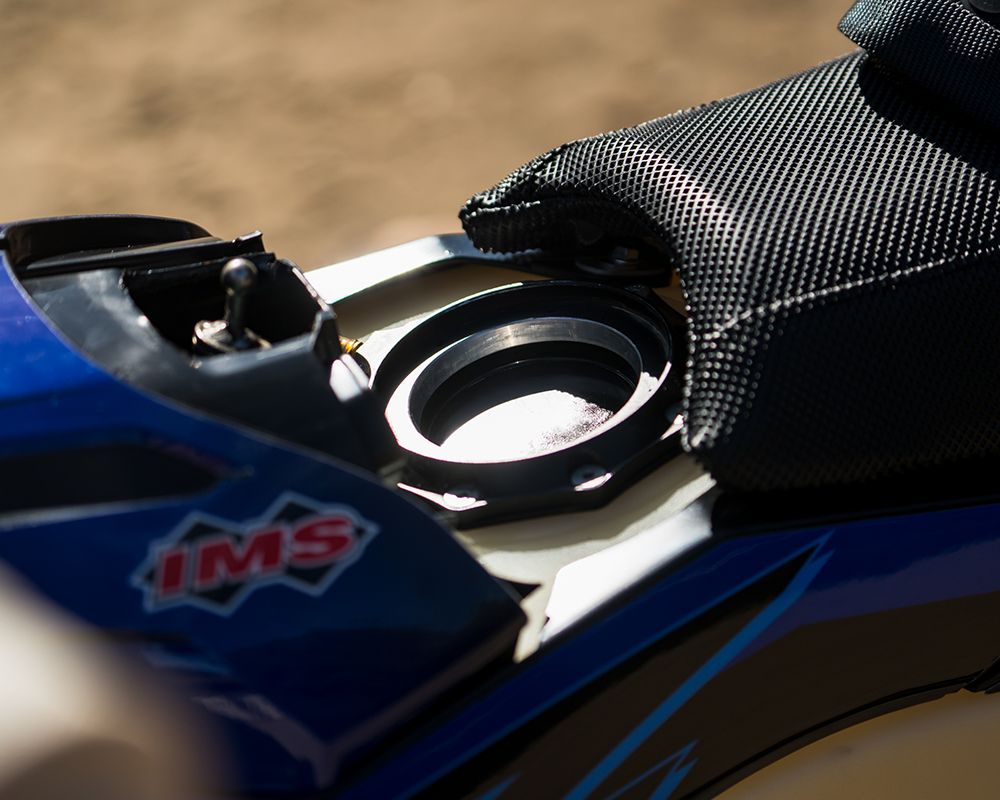
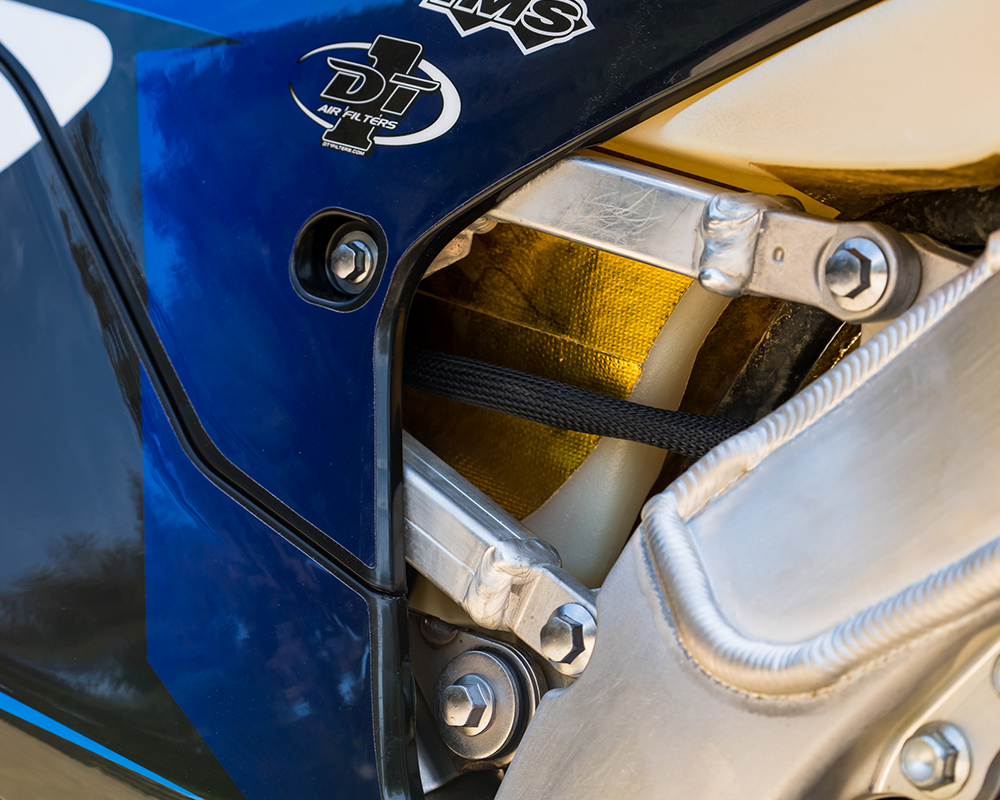
IMS Products is an industry leader in oversized fuel tanks and was an easy choice when adding one to this bike. While the install is very difficult the first time, cutting down on pit stop times is crucial when going for the win, and the added capacity allows us to go further when needed. Over the course of the race, we averaged 1.5 – 1.75 gallons per hour, leaving us plenty of extra fuel in the 2.8 gal tank.

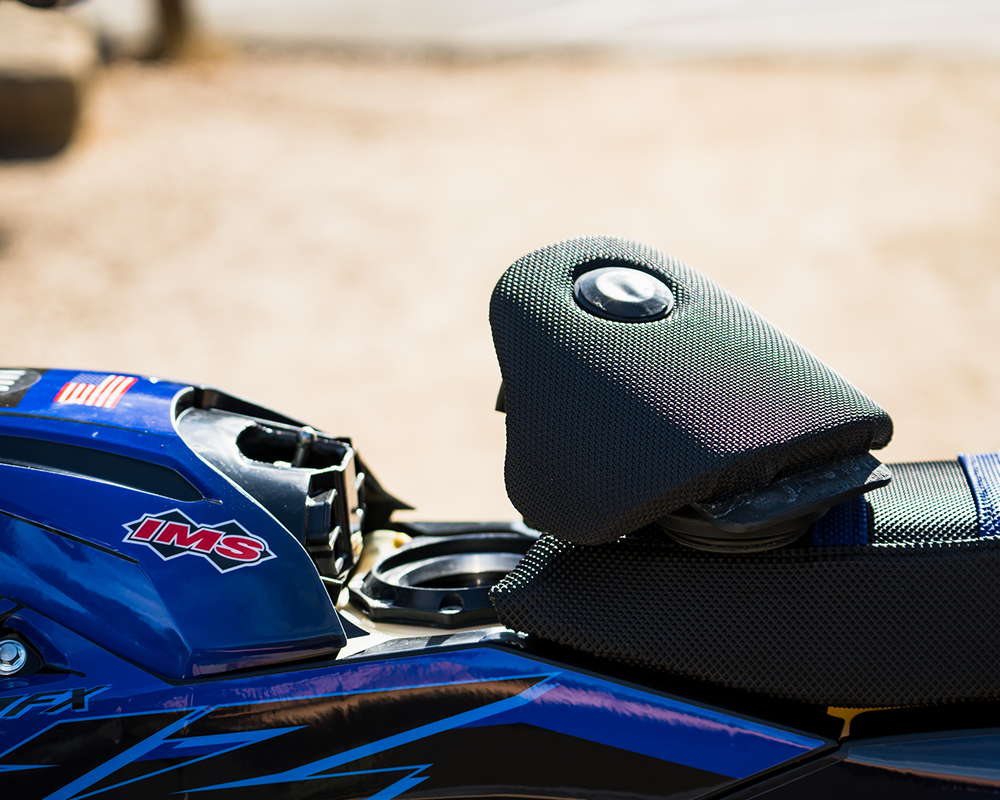
One of the coolest parts we tested is Baehr Concepts’ new dry-break cover for the new gen Yamaha. The 3D printed piece is a one piece design that incorporates the front seat base and has a dry-break cap molded in. Additionally, it utilizes a push button system to remove it from the bike, so rather than trying to use the quarter turn Dzus fastener and hoping it catches and latches quickly, you simply push the button to pull the cap off and push the cap on. In all 24 of our pit stops, we never once had an ounce of dirt in our dry-break receiver, making fuel stops a breeze. To get your own, contact @Baehr_Concepts on Instagram. If you run a dry-break receiver on a new Yamaha, this is a must-have part. The dry-
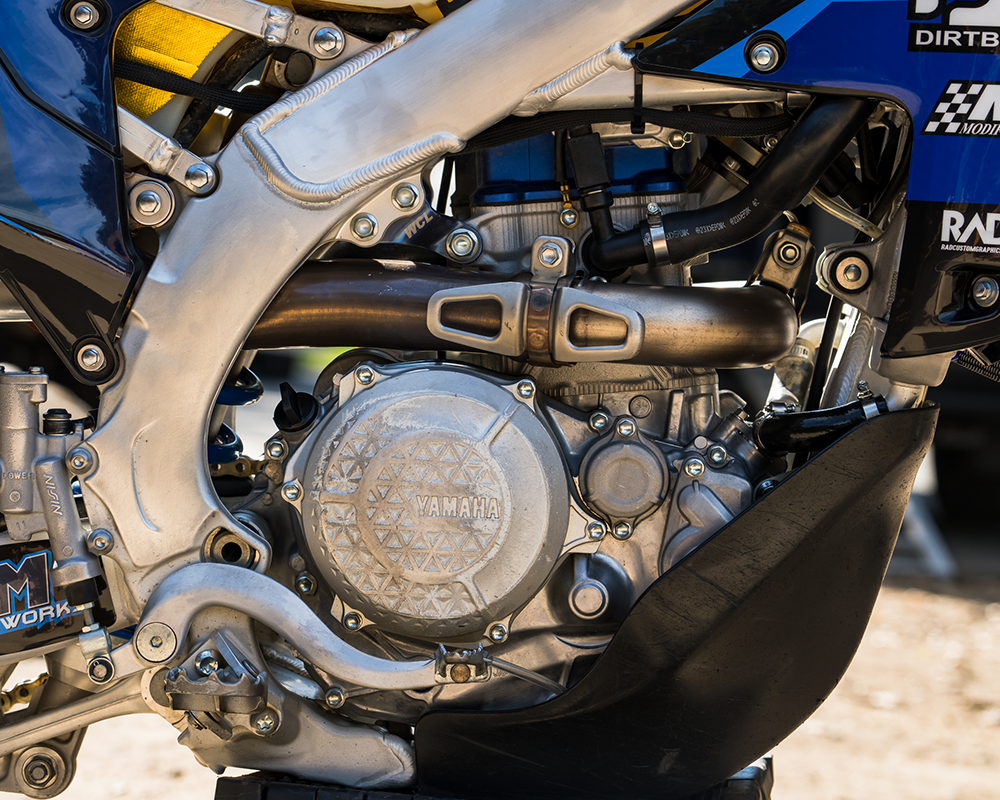 Engine wise, the bike is completely stock, mapping and all. We freshened up the clutch by replacing the fibers and steels before the race since the engine had 45 hours on it, but the rest has never been touched. Most of our riders liked the stock all zeroes map so we kept that in for the race.
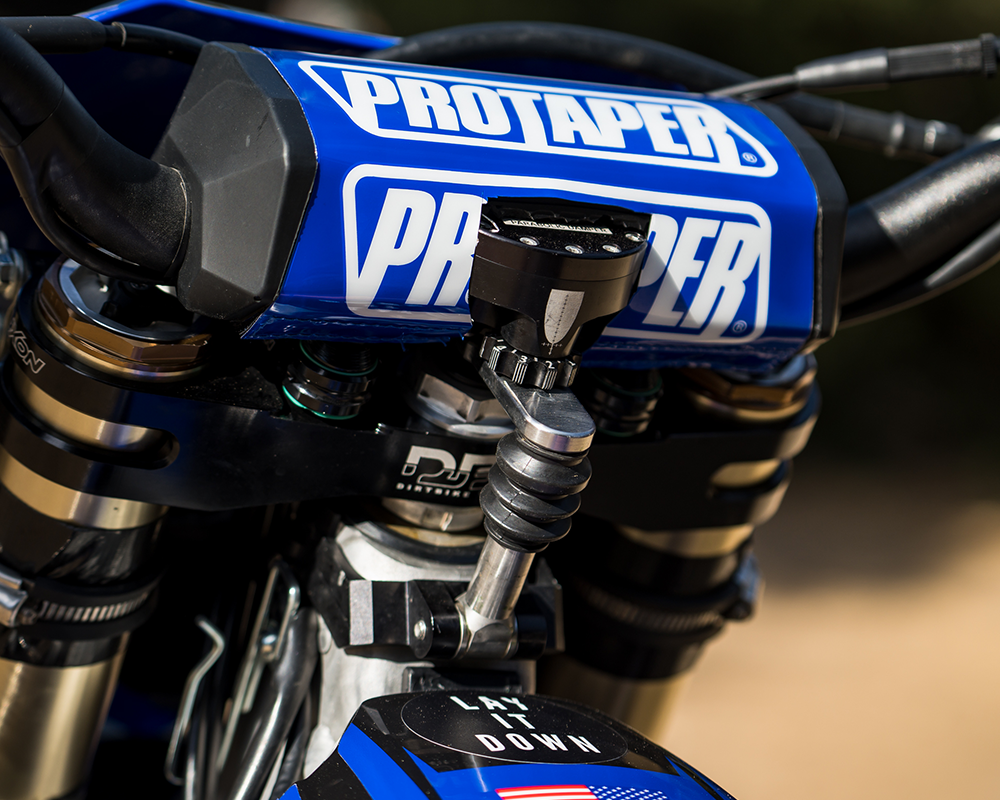
Precision Racing Steering Dampeners are still fairly new to dirt bikes, but they work very well and clamp to the handlebars themselves instead of the triple clamps or bar mounts, allowing us to run the Luxon clamps with no interference.
 A Works Connection Clutch Perch eases the clutch pull and feels good on the hands — both coming in “clutch” for a race as long as this.
Aside from the triple clamps, there are a lot of stock features about this bike in terms of “performance” modifications. The engine is left alone completely, including the ECU and exhaust. The suspension components are stock with some simple valving and springs. The chassis is fairly stock with an aftermarket upper engine mount and triple clamps, but no linkage and a “modified” stock front mount. Here at DBT, we build bikes to work, not to look like a parts catalogue or to look pretty. Though we do think this bike looks great with the RAD Custom Graphics design, everything on here serves a purpose and adds a performance value to the bike, be it in actual performance or durability. Stay tuned for a race report on how the race went, how the bike held up, and what we may want to do different for next year’s event.
Do You Like DBT Bringing You Fresh Content? Search and Shop Through the Links Above or Below: