2021 YZ450FX Bike Setup
Story by Trevor Hunter
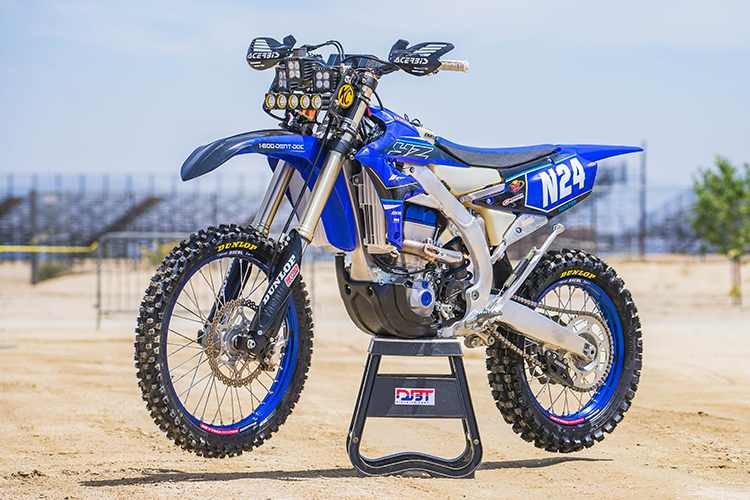
We recently raced the 10 Hours of Glen Helen on our brand new 2021 Yamaha YZ450FX, and with it being a night race, we figured we’d give you a little insight on how we set the bike up to handle lights and take on 10 straight hours of Glen Helen. With very little time on the bike prior to the race, we stuck to the basics in our prep.
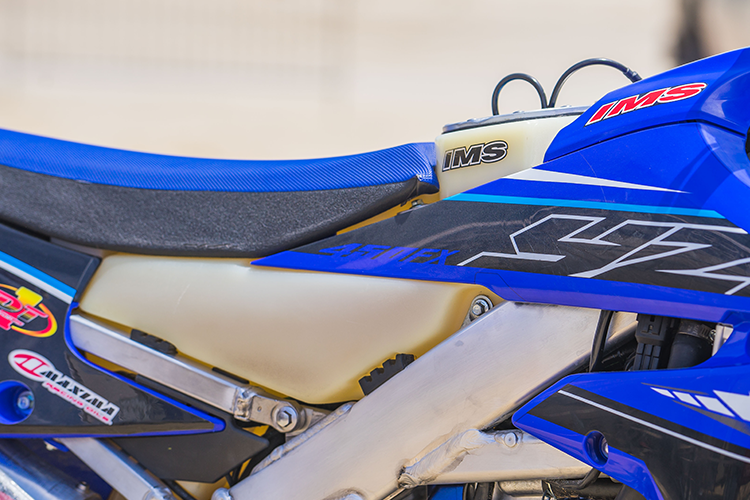
We used an IMS 2.8 Gal Dry-Break tank, a necessity for a race this long. With multiple pit stops and riding stints lasting for over 1 hour, the extra range and quick-fill features are much needed.
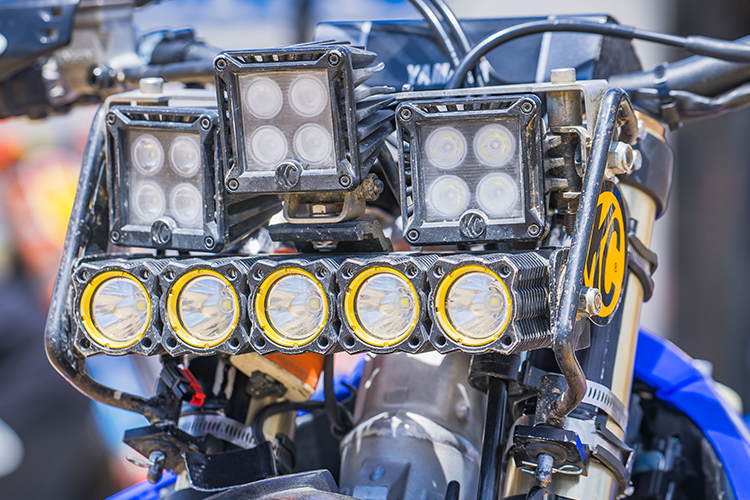
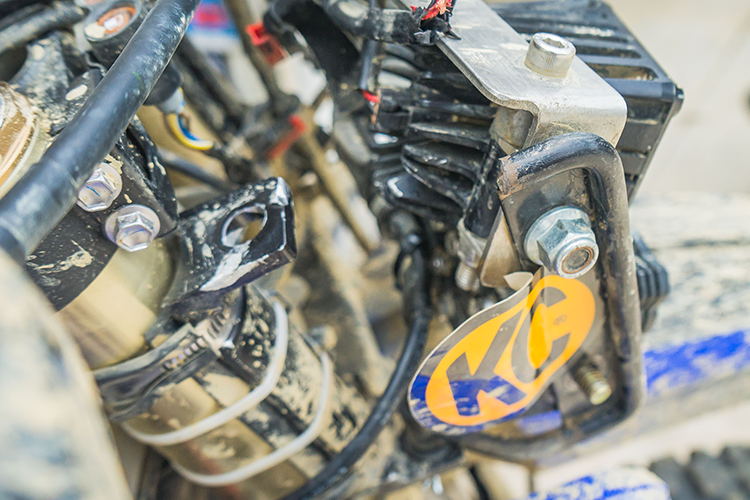
Next up is lights. We’ve been running the same KC Hilites setup since 2016 so we broke out the lights again and wired up the bike to power as much as we could. With the lights needing about 120W of power for all of it, not all of it could be run off the bike.
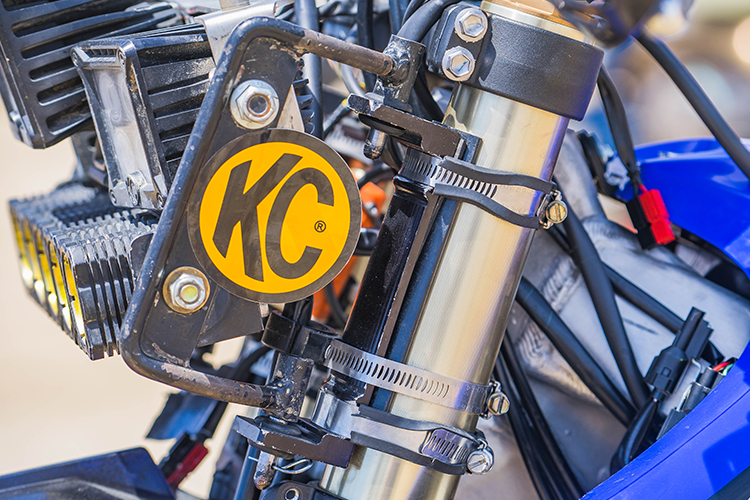
Instead, we’d rely on external battery packs to do part of the powering. However, with the newer generation Yamaha’s, they don’t produce the power output like they once did or like the off-road WR models do. Instead, they use the same components as the MX models, only producing about 70W total, with ~38W of available power after accounting for the fuel pump and other electronics.
Knowing all of this, we wired our lights to power one light pod (20W) off the bike, another pod (20W) off an external battery mounted on the bike, and the final pod + light bar (80W) off a battery carried in our fanny pack. It seems complicated, but we had it dialed in and it ended up being quite simple. We have since started using the stator and flywheel off of a WR450F and can power quite a bit more — near 100W of available power with this setup. You can support DBT and find those parts on Rocky Mountain ATV/MC HERE (under the Generator tab of OEM WR450F parts)!
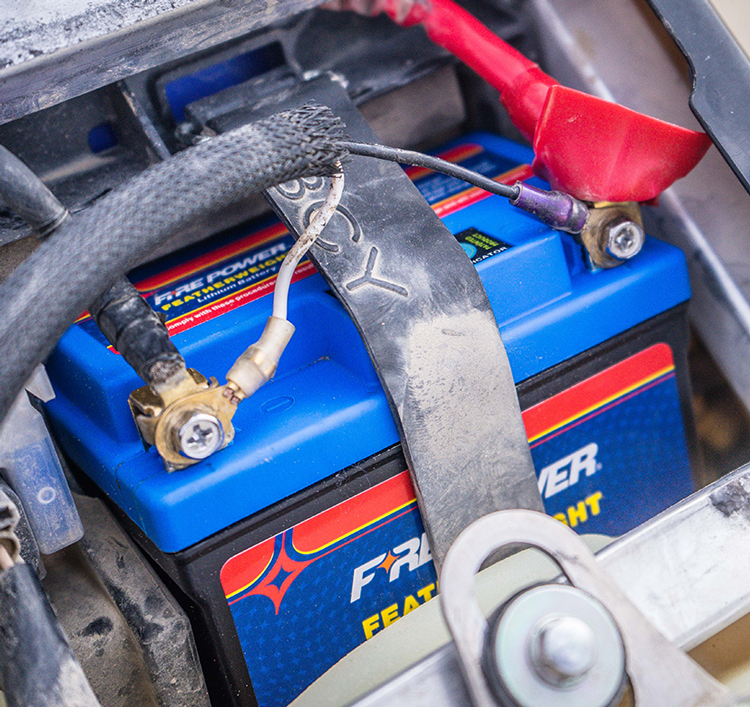
When wiring our lights to the bike, we connected it straight to the battery. To keep it simple, we power our lights directly off the battery. It’s a bit risky because if the lights drain the battery, there’s nothing left and you need to bump start the bike to get it going again. But, it produces the most power here so you have the best chance of powering your lights here. We also ran a Fire Power battery from WPS since we’ve had really good luck with the durability thus far.

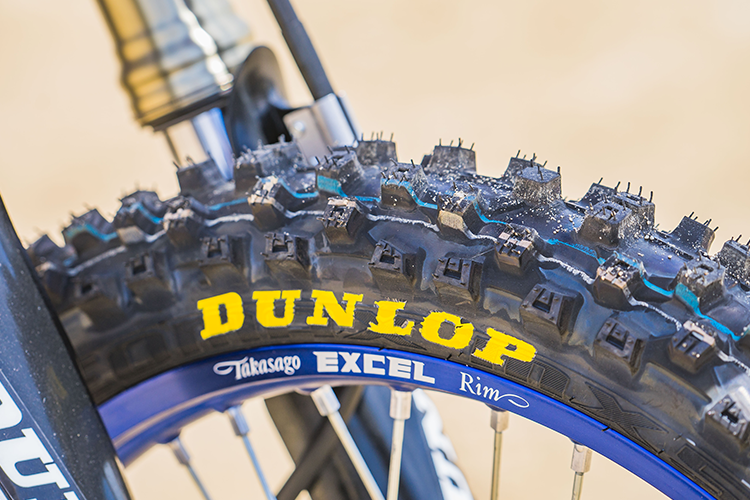
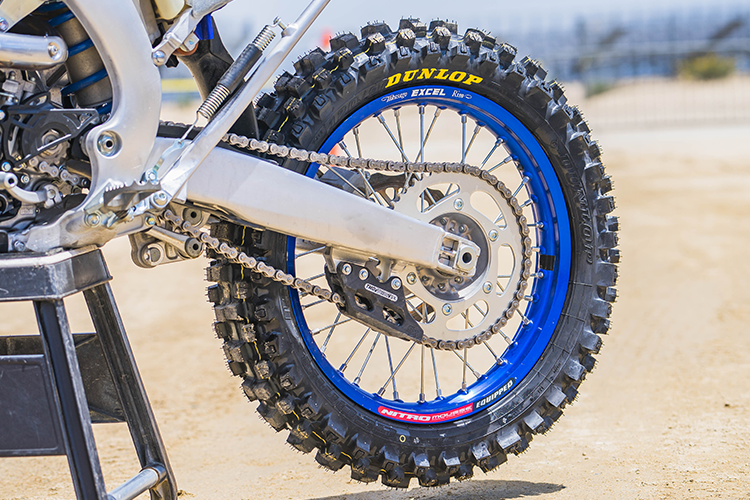
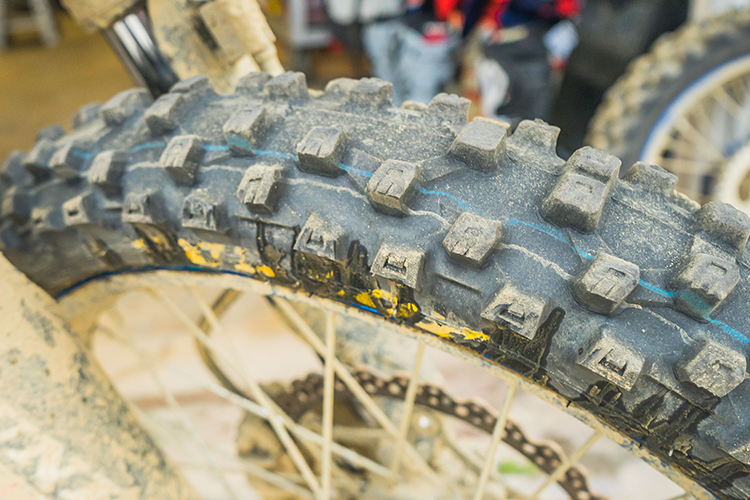
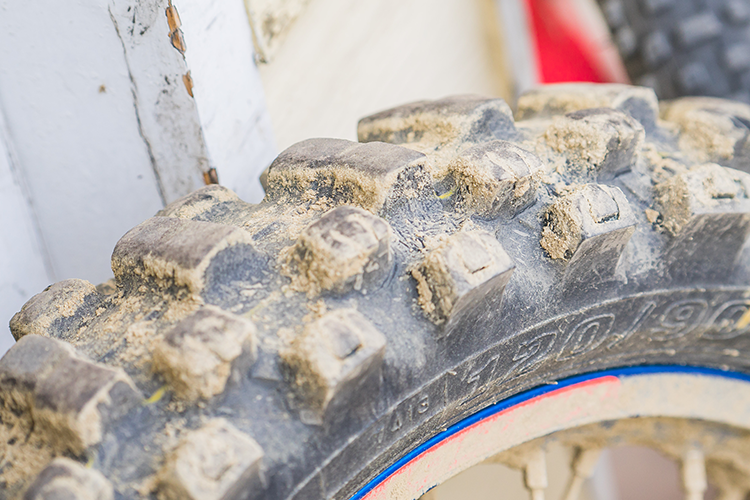
The last few components were for durability more than anything. We mounted some fresh Dunlop MX53’s front and rear thanks to Jay Clark at DirtBikeTV. They worked really well in the variety of terrain we encountered, including hard-packed ridges, silt, sand, and pavement. They also last quite well and avoid any significant decrease in performance as they wear down.

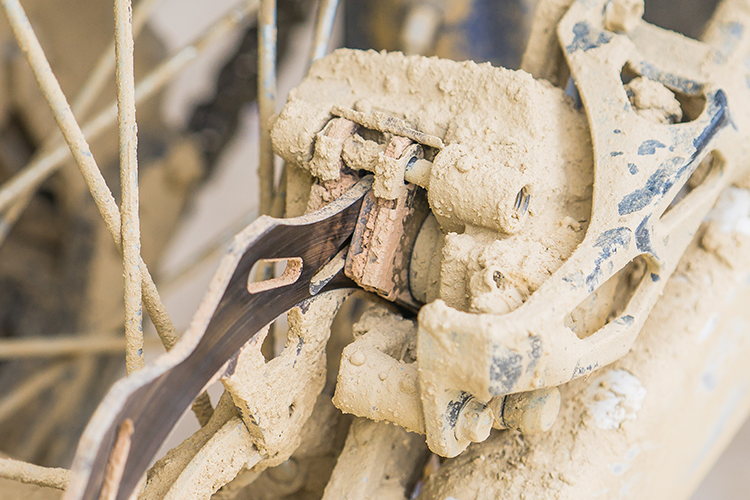
Nitromousse’s front and rear were used to keep us flat free throughout the duration of the race. They last forever when lubed properly, so we could count on them to stay consistent for the 6+ hours they would be on the bike. Acerbis Handguards protected our hands since the YZFX doesn’t come stock with hand protection. AME Grips are much softer than stock and help preserve our hands as we put in 5-6 hour of hard riding time within a 10 hour period. Lastly, a TM Designworks Chain Guide was installed to avoid bending or breaking the stock aluminum guide in the rocky sections.
Suspension-wise, we never touched a clicker until the lights came on. Near the end of the day, the forks started getting a little soft in the big braking bumps so adding heavy lights to the front would only compound it more. To combat this, we stiffened up compression 5 clicks on the fork and the bike felt as good as ever. Near the end of the race again, they started to feel a little softer but they were still more than rideable.
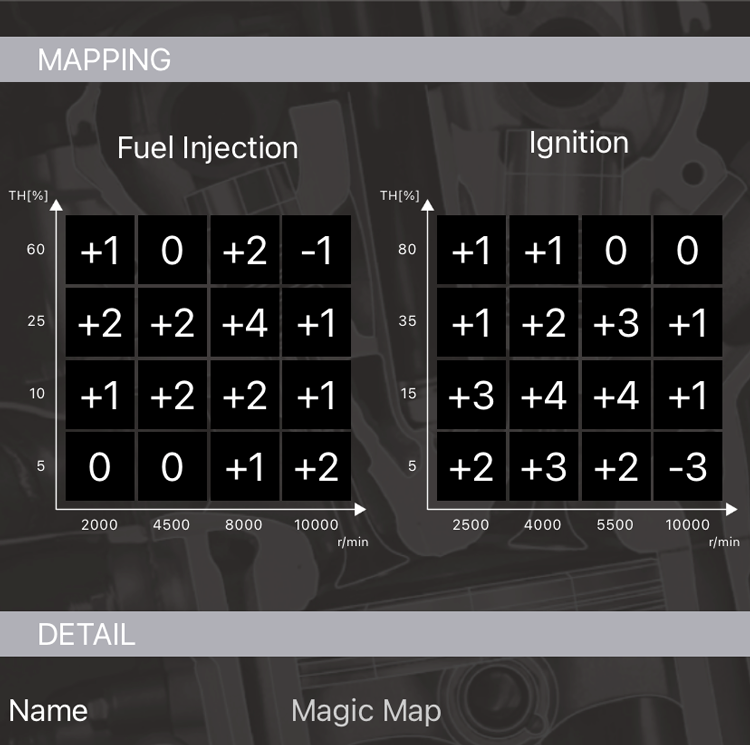
One of the best features of this bike is the GYTR Power Tuner App and although we didn’t have much time on the bike, we knew of a map we liked on the YZ450F MXer. The “Magic Map” smoothes out the power and even the chassis on the Yamaha, making it much easier to ride, especially for longer periods of time. Click HERE for some GYTR maps from the bLU cRU.
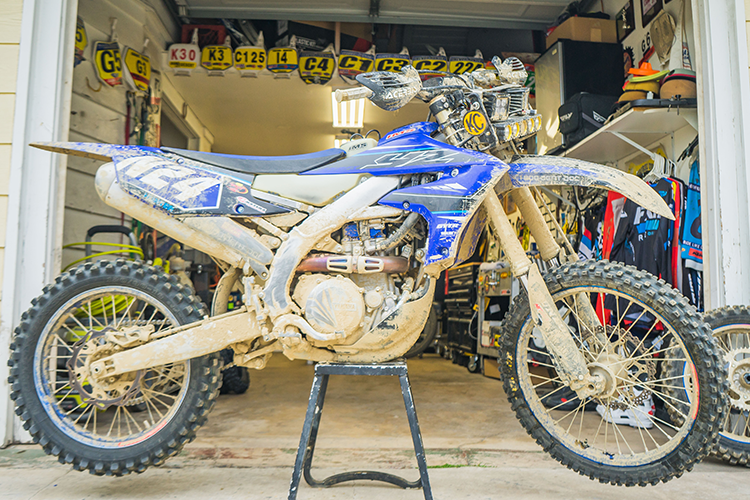
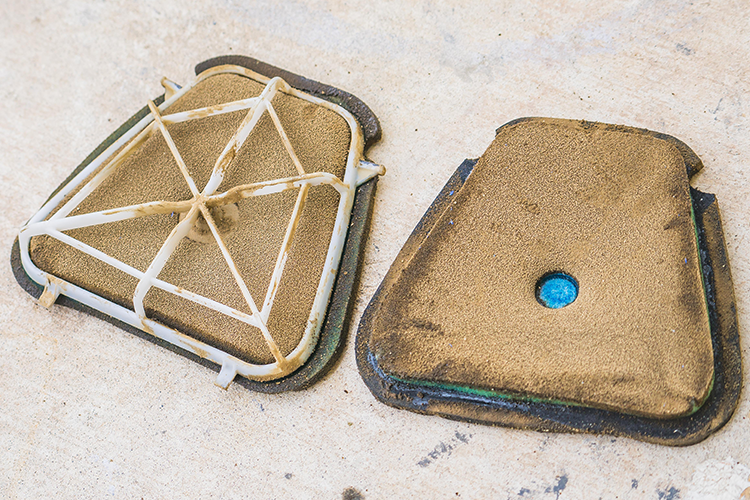
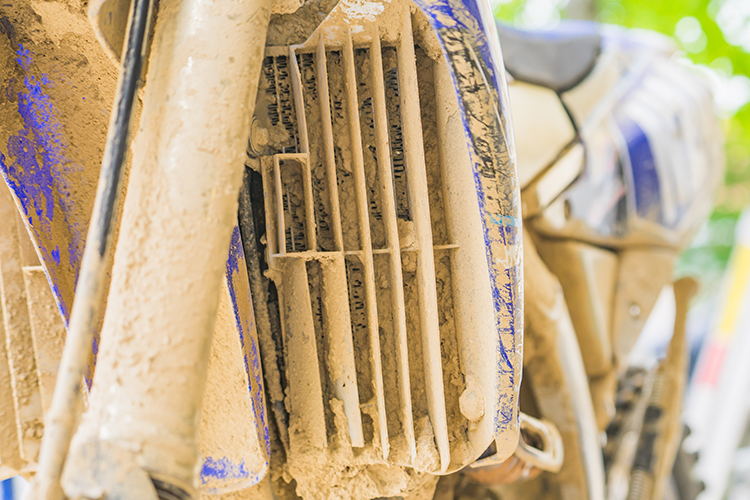
So how did the YZ hold up after the race? Quite well! Structurally, the bike is still solid. We changed an air filter at hour four, then ran that through the night for the next six hours. Both were dirty with an abundance of dust and silt, but the bike still ran with no issues.
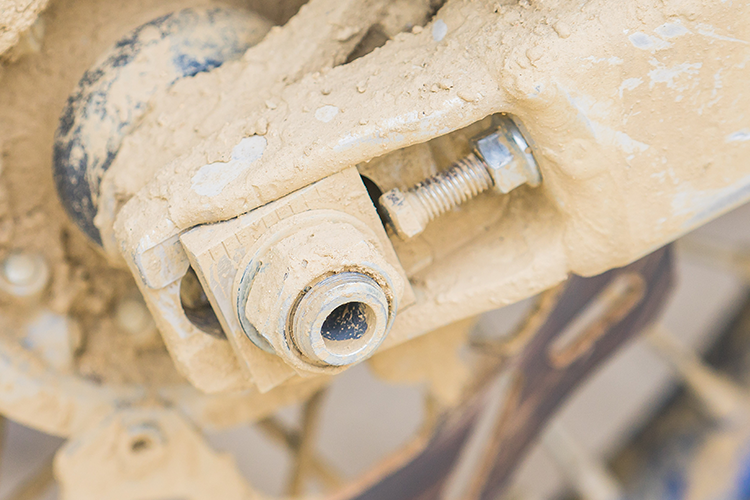
Additionally, we knew going 10 hours on a rear tire was all but impossible, so we decided to change the rear wheel when we did the lights at the hour four mark, along with the air filter. The only snafu we had with the rear wheel was when it was put back on, the chain wasn’t tightened and the right side axle block was backed off of the chain tensioner bolt.
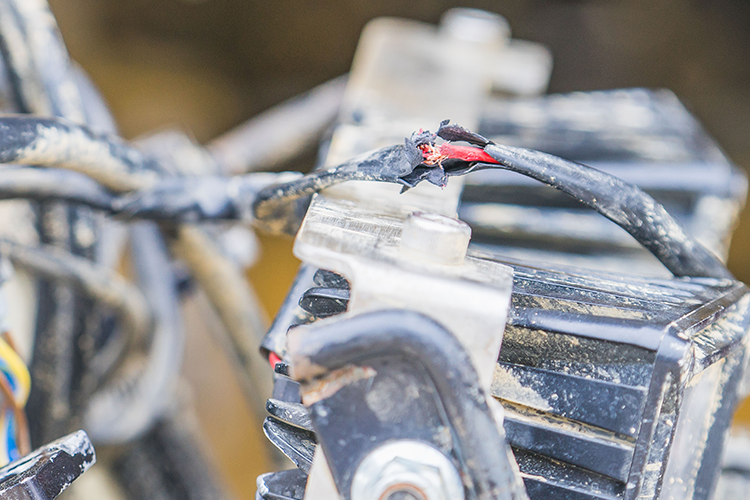
The lights were our biggest and only real concern during the race. After years and years of abuse, we actually decided before the race even started that this would likely be the last time we really use the lights since they have seen better days. Well, unfortunately they didn’t make it to the finish as the brackets broke with about an hour to go. In addition, one of the center pods broke off a few laps before this, and one of the pod wires was rubbing on something and had almost completely worn through the wire.

Overall, the YZ450FX held up great and performed even better. We never touched a clicker or even really set the sag, just lining it up how it came mechanically and setup-wise. The only significant change we made was placing the handlebar mounts in the backward mount but in the forward position. Stock, it now comes in the forward mount but backward position, but that puts it too far up for our liking. Both Tyler and I were really happy with how the bike handled throughout the race, and we’re still scratching our heads trying to think of ways to improve the bike. Stay tuned for a full bike test and some setup tips as we put in more time on the blue machine.
Check out the full Race Report HERE.
Support DBT, Shop and search for products through the link below: