Project Yamaha YZ125 Learning Curve
Time has slipped by and a lot of things went down on this rebuild, most which was not good.
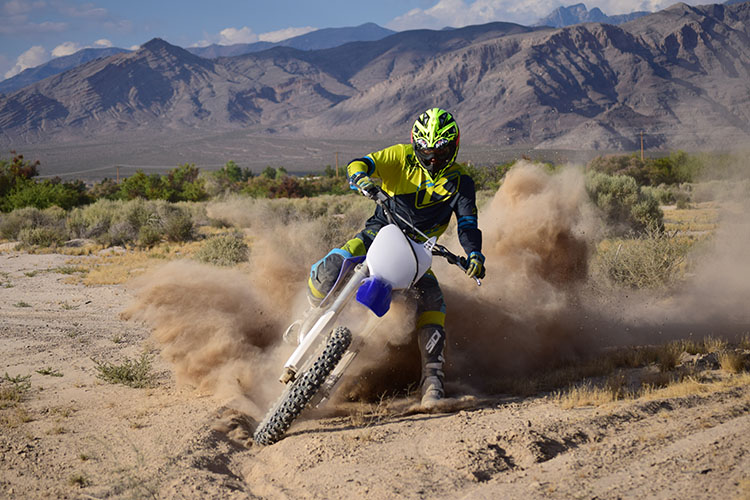
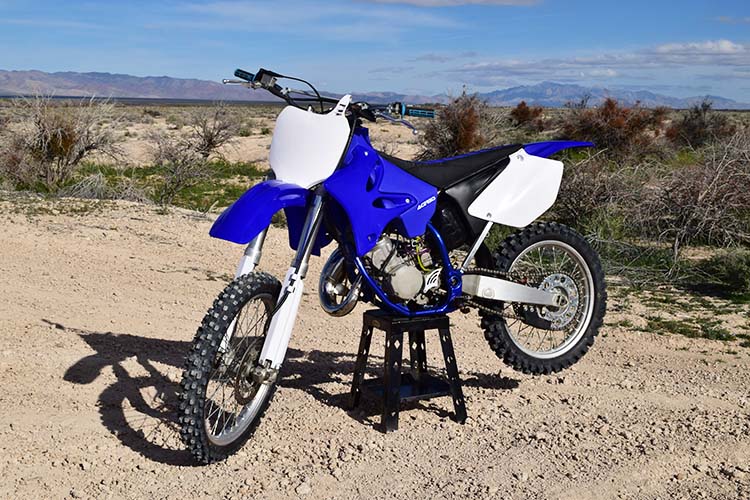
Well here it is, the final conclusion to the Bike in a Box story. This little 2003 YZ125 smoker started its life in my custody in a series of boxes with a rusted frame to top it all off. Today, my ride is 100%, yet the project took a lot longer than expected since the last chapter of the story was posted. Lets just deduce stuff happened, lots of stuff, most of which I wasn’t anticipating and none of it was for the better or the cheaper, I can assure you that.
The cylinder was delivered a week after the last article went up and I wasted no time reassembling the top end. Then there was a waiting game trying to save up for an exhaust. Of course when I told Jimmy Lewis, the team principle of Dirt Bike Test, he helped expedite the process and with a call to Uncle Donnie himself at FMF and soon enough a package was on its way. Don’t worry, I paid for it, boy does Jimmy have a lot of motorcycles that always need washing. In the meantime tortured myself by making sound effects and pretend to be throwing huge whips while in my garage. Just my luck, when I sat on the bike the shock emitted sounds of air bubbles and realized another can of worms just reared its head and it had to be rebuilt.
A couple of weeks went by before I got the exhaust and when I did, I traded Jimmy the shock and he volunteered to rebuild it since he had the tools and I didn’t. When I got home though, nothing could stop me from putting the shiny new exhaust on my ride. With all the engine components finally put together, I decided to fire it up. It didn’t take more than a few kicks before the bike came back to life from the grave. Now it was break in time, I let the engine idle for about ten minutes then shut it off, then repeated the process for four more heat cycles.

When I finally got the shock I slapped it on and in no time I had the little beast spinning laps around the yard for the first time. It started on the 3rd kick and I wheeled it out of my shop. Once I felt heat in the radiators I had decided it was time to kick it in gear and get on the gas. So I bumped that gear shifter down and nothing happened. Not wanting to give up so easily I pushed it down again. Nothing happened. I then franticly started bumping that gear shifter down and nothing happened no matter how hard I tried to put that bike into first. Obviously I was concerned and tried pulling up on the gear shifter and the bike bumped into second. From there I had my dad push me and I was able to ride the bike around from 2nd and up, but it wouldn’t bump into first.
After that first ride I looked online and figured out that either the shift star was worn or one of the shift forks were bent. Guess which one it was? Neither. I took the case cover off and tried everything with the shifting assembly. Nothing changed. I then took a break to let my emotions cool down a little bit and then took the engine back out and split the cases. I inspected the shift forks and found that none of them were bent. I then compared the order they were in when I took them out to a manual that I found online to discover that I might actually be a little stupid. Yes, I put the forks in out of order when I first rebuilt the engine. After I finished piecing together my pride, I put everything back together, threw the engine in the frame and fired it up. It shifted into first gear just fine and took a lap around my yard. Satisfied, I parked it back in my shop, topped off the tank for the next day and proceeded to do my little happy dance for the rest of THAT night.

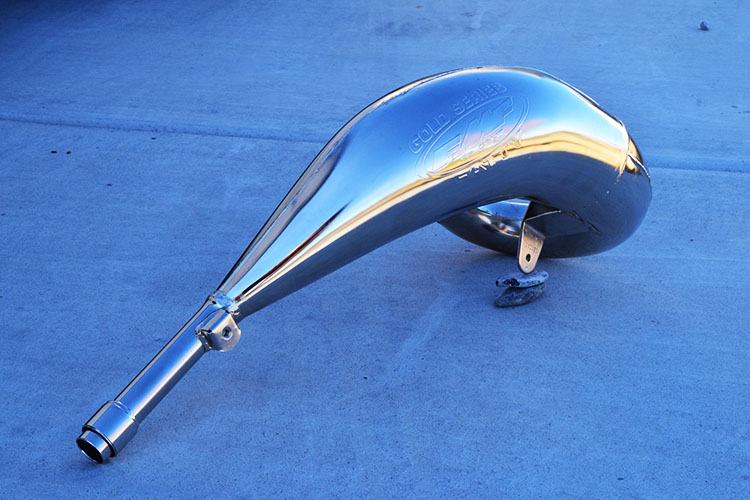
First ride went great until I pulled the clutch in while going around a turn and the bike stalled. I pulled over, looked down and found oil all over my boot and a hole punched through the case cover, “ARE YOU KIDDING ME”. Thankfully I was with a buddy at the time and he was nice enough to give me ride of shame back to my house. I then took my other bike out for the rest of the day to blow off some obvious steam. The next day I tore the side cover off to discover that the bolt that holds on one of the drive gears onto the crankshaft had come lose and unscrewed itself out to the point where, you know the rest, hole in the sidecase. I was glad to see it was something kind of minor and in the end was a simple fix, however still an expensive one because I needed to buy a new side case cover, and a clutch cover.
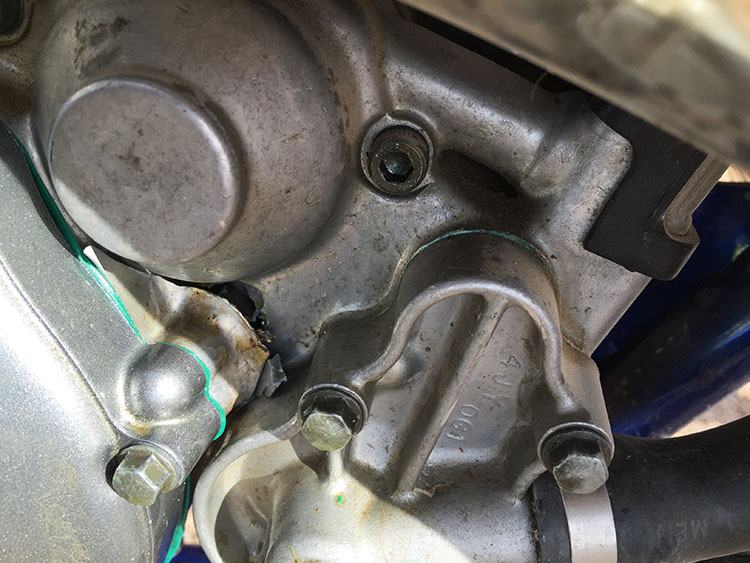 Show this to your kids so they can see what happens when you don’t double check your work.
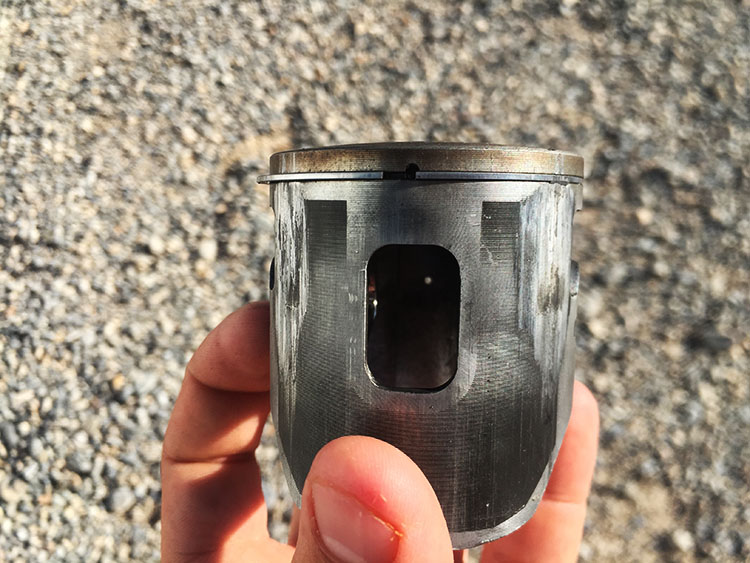
After I fixed that, I had a few successful rides around the southern Nevada desert where I live. Then came time for the photo shoot which never happened. The piston had seized on the way to that photo shoot,”again, are you #$%@ kidding me”. So yet again I had to take the cylinder back off and order up a new piston. While I was waiting on the piston I used an acid and brush to get the aluminum off of the inside of the steel plated cylinder, which smelled nice, “wow man”. Then I honed the cylinder, tossed in another new piston and put it all together-again!
From there, other than a few carb issues and fouling plugs, it completed a few rides around the desert no problems and is running perfectly. Yes, this bike is finally done. Aside from a few minor tweaks, for a bike that came in a box, it’s now back to being a real bike, just an expensive learning curve but I know I won’t make the same mistakes twice. Here’s what it took to get the bike to this point.
To get it running:
Pivot Works Rear Shock Absorber Bearing/Bushing Kit- $39.95
Pivot Works Swing Arm Bearing/Busing Kit- $69.95
Pivot Works Linkage Rebuild Kit- $89.95
Pivot Works Fork Rebuild Kit- $74.95
Hot Rods Crankshaft For Models: 2001-2004 YZ125- $251.95
Hot Rods Main Bearings and Seal Kits For Models: 2001 – 2004 Yamaha YZ 125- $70.05
Vertex Piston- $124.48
Yamalube Yamabond- $9.99
Tusk Stainless Steel Typhoon Brake Rear Rotor- $59.99
Tusk Throttle Cable- $9.99
Polisport Lower Fork Protectors- $25.99
Attack Graphis Pro Series Gripper Sear Cover- $35.99
Polisport Complete Replica Plastic Kit- $94.99
Dunlop MX52 80/100X21- $69.88
Dunlop MX52 100/90/19- $77.88
Acerbis Fuel Tank 3.2 Gallon- $209.99
EBC Clutch Kit – 2003 YAMAHA YZ125- $72.99
MSR Dominator Clutch Bracket with Quick Adjuster Polished – 2003 YAMAHA YZ125- $22.95
Odi V2 Emig Thowback Edition MX Lock-On Grips Black/Cyan – 2003 YAMAHA YZ125- $24.99
EBC Front Carbon Brake Pad 2003 YAMAHA YZ125- $25.81
EBC Rear Carbon Brake Pad 2003 YAMAHA YZ125- $22.99
Cylinder Resleeve- $324.82
Painting the Frame- $300
OEM Spring- $2.97
OEM Pin Clevis- $5.37
OEN Cotter Pin- $1.52
OEM Washer- $1.66
OEM o Ring- $2.89
OEM Bolt- $23.75
OEM Band- $9.93
OEM Bearing- $12.92
OEM Bearing- $13.32
OEM Flange Bolt- $3.86
OEM Exhaust Joint- $29.30
OEM CDI- $320.31
OEM Nut- $3.71
OEM Crown Nut- $5.61
OEM Washer Plate- $3.21
OEM Bearing- $9.94
OEM Push Rod- $34.21
OEM Nut- $7.68
OEM Lock Washer- $4.99
OEM Pressure Plate- $29.45
Learning Curve list:
OEM Crankcase Cover- $131.93
OEM Flange Bolt- $3.86
OEM Gear, Impeller Shaft- $67.01
OEM Wing bolt- $5.44
OEM Washer- $1.97
OEM Flange bolt- $1.60
Vertex Replica Piston Kit for 2002-2004 YZ125- $124.48
Hot Rods Water Pump Repair Kit- $15.99
In the end this build cost $1853.75 and would have cost $2833.06 if not for the parts I got from Hot Rods, Pivot Works, Vertex, FMF, and Jimmy. But after all of that, I have learned more about the mechanical aspect of owning a dirt bike than I ever would have and I did had a lot of fun building it. Personally I would’ve had more fun with this build if it was $1000 cheaper, but in the end, it’s up to the individual whether or not all that money is worth the learning experience or not. Besides, after all that I have a very fun and awesome YZ125 that I can say I truly built.


In case you’ve just started visiting Dirt Bike Test, here are the links to the other stories in this series
:http://dirtbiketest.com/fresh-dirt/bike-in-a-box-2003-yz125-rebuild/
http://dirtbiketest.com/fresh-dirt/bike-in-a-box-2-the-rolling-2003-yz125/
http://dirtbiketest.com/fresh-dirt/bike-in-a-box-3-almost-done/
Support DBT by shopping through the links below: