It’s been awhile since this 125’s been shown on the site and there are some reasons for that. I won’t go into all of them but just let me tell ya, college classes and high school is a couple of handfuls. But since you’ve seen this bike, a lot of things have happened and you wouldn’t recognize this bike if you had seen it before I got my hands on it.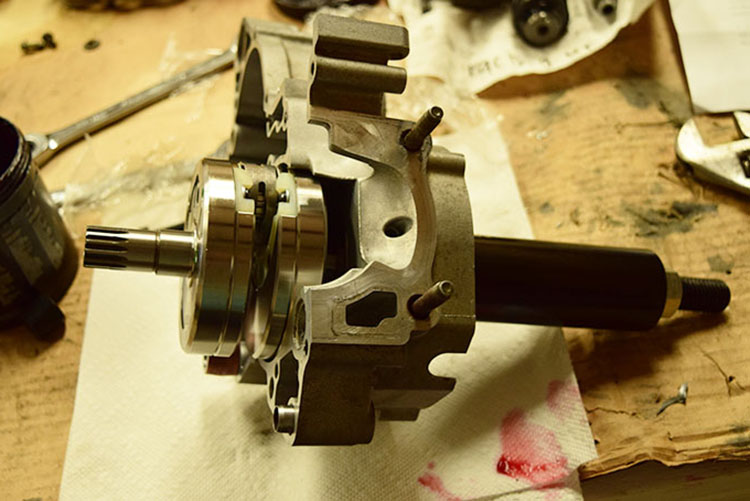 The old crank looks pretty banged up compared to the new one.
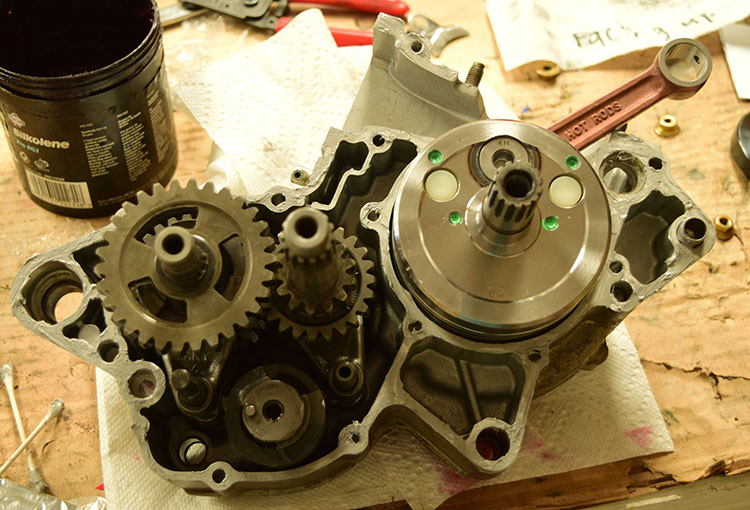
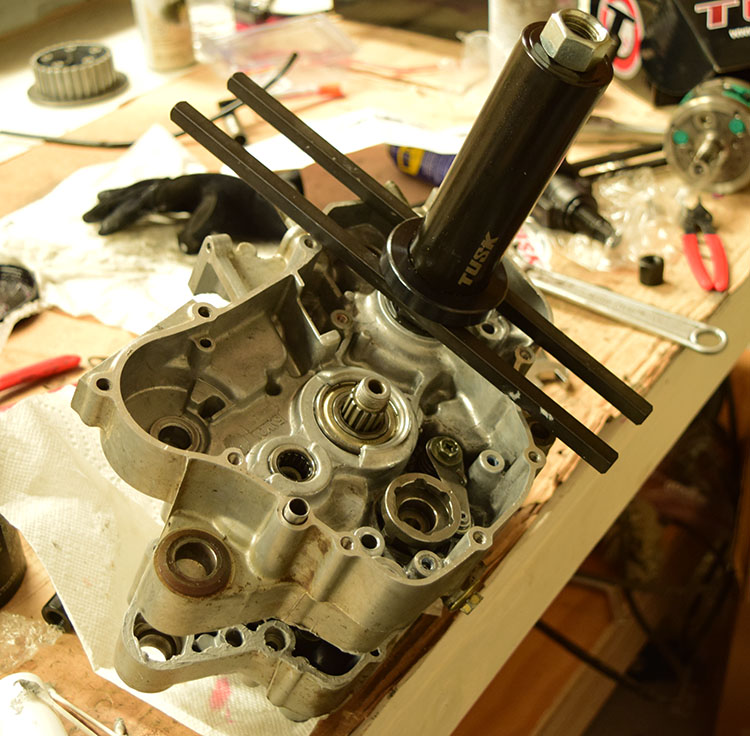
First thing I did after I had posted the last update was split the cases with a case splitter and waited for new crank bearings that Pivot Works had sent me. The old bearings weren’t any good, so when the fresh bearings came in, they went straight out of the box and into the freezer. While the new ones were chilling, I banged the old ones out of the case half’s with a socket and a rubber mallet. Once I had the old ones out, I waited a little bit then took the new bearings out of my freezer. I then heated the case half’s up where the bearing go, and the new ones just dropped right in. Now that I had new crankshaft bearings in, it was time to put the new crankshaft that Hot Rods had sent me in, which I had to order a crank installer tool for. With the tool in hand I went straight to work with it and slid the new crank right in.

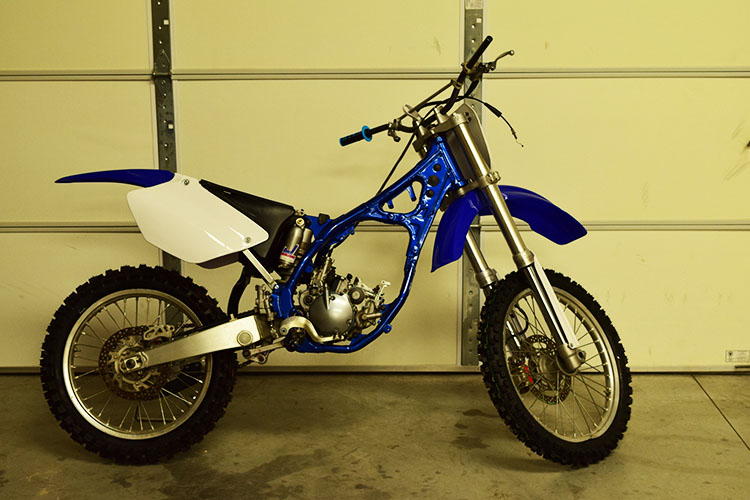
After the crank went in, the bike just sat for a while. Mocking me with its empty frame and naked look every time I took a break from school to go for a quick ride. Eventually I got tired of it just sitting there with parts scattered across the table. So I put the engine in the frame and ordered most of the things that I still needed from Rocky Mountain. Among this list of parts was a complete plastic kit, clutch plates and springs, foot peg springs, levers, a gear shifter, brake pads, tires, a chain, sprockets, tire tubes, rim strips, grips, and just about my net worth.
Having these parts at my disposal, I went into overdrive with working on the bike. I started with putting a new sprocket on the rear wheel and then put the tires on both front and rear wheels so the bike would roll around easier. I think I was a little too excited because when I had put the new front tire on, I had put it on the opposite direction that I should have. I didn’t notice that it was directional until I was tightening up the front axle. Needless to say I had to take the tire and tube back off and flip the tire around and put it back on. Fun.
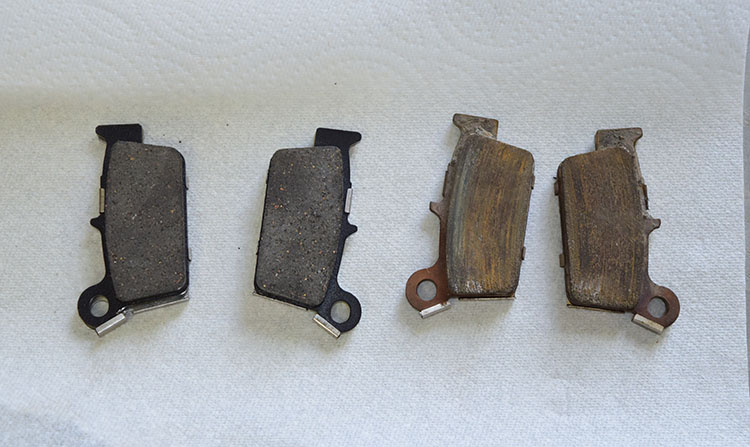
While the wheels were off the bike, I had taken out the old brake pads on the brakes, which were rusted and were covered in spider webs, and put new carbon ones in their place. With the new brake pads in, I put the whole rear brake back on where it should be and put the rear wheel on. I had put the front wheel back in place then put the front brake on so it would be easier to fit the front brake rotor on in the brake pads.
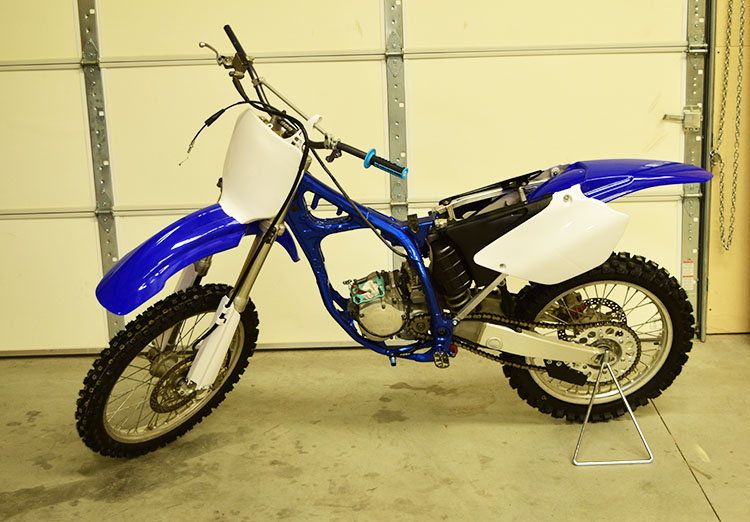
Now that there was new tires and brakes on, I went ahead and put the new plastics on the bike. The plastic kit I ordered was just a replica kit since I’ve heard from people who have restyle kits that they’re very flimsy and don’t last as long. This made the bike look like it had just rolled out of the dealership 12 years ago, with the exception of no exhaust, gas tank, and cylinder.
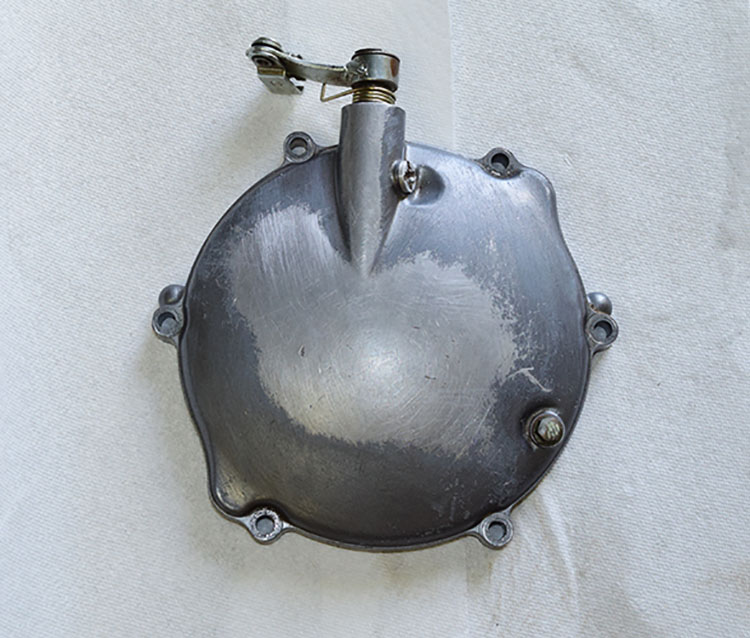
Finally with all of this stuff on the bike, I put in the clutch basket and inner hub that I found in one of the boxes that came with this bike in the engine. Then I put in the new clutch plates, pressure plate, and springs in the engine. I went to put the clutch cover back on to seal the deal only to be reminded that the cover was in pretty bad shape. All of the paint had been worn off and kinda ruined the whole fresh out of the dealer look the rest of the bike had. So I went down to home depot and got some dark steel spray paint and made it look like brand new.
Now this bike is almost done. All that is left is getting the cylinder resleeved and getting a new pipe and silencer. So the next time you see this bike, it will be running and all about setting her up. I am having a blast building this bike from the ground up and I would do this again in a heartbeat. However, this bike is getting very, very expensive to rebuild. But I have learned so much building this bike. To me, that makes it worth every penny.