Harbor Freight Haul Master Motorcycle Carrier
Company: Harbor Freight
Price: $179.99
- Very low price, almost half of competitive hitch haulers.
- The mounting points and design are spot on.
- The unit flexes and sways even with a 250-pound bike attached.
- The quality of the aluminum extrusion holding the carrier together is poor.
- You are getting what you pay for.
What it is
- A hitch mounted motorcycle carrrier for a claimed capacity of 400-pounds.
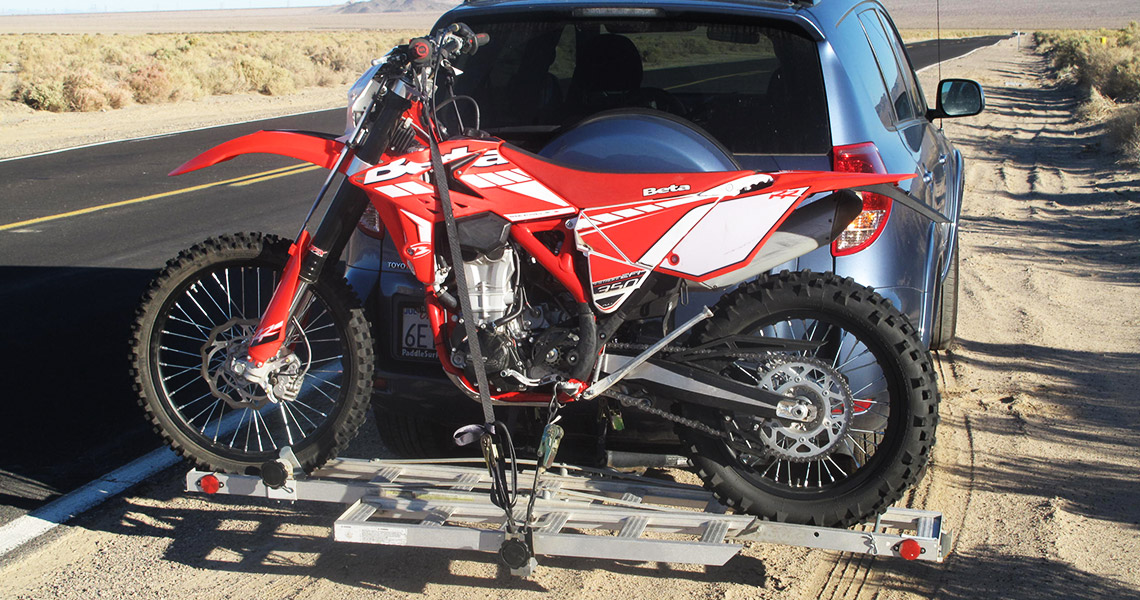
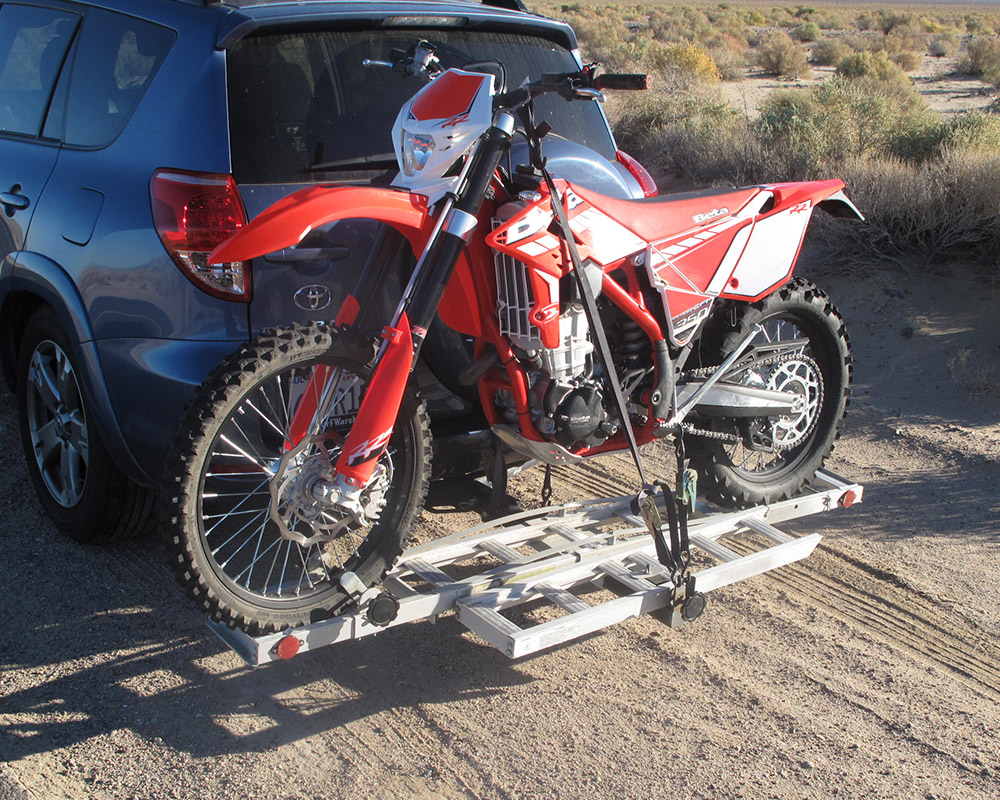
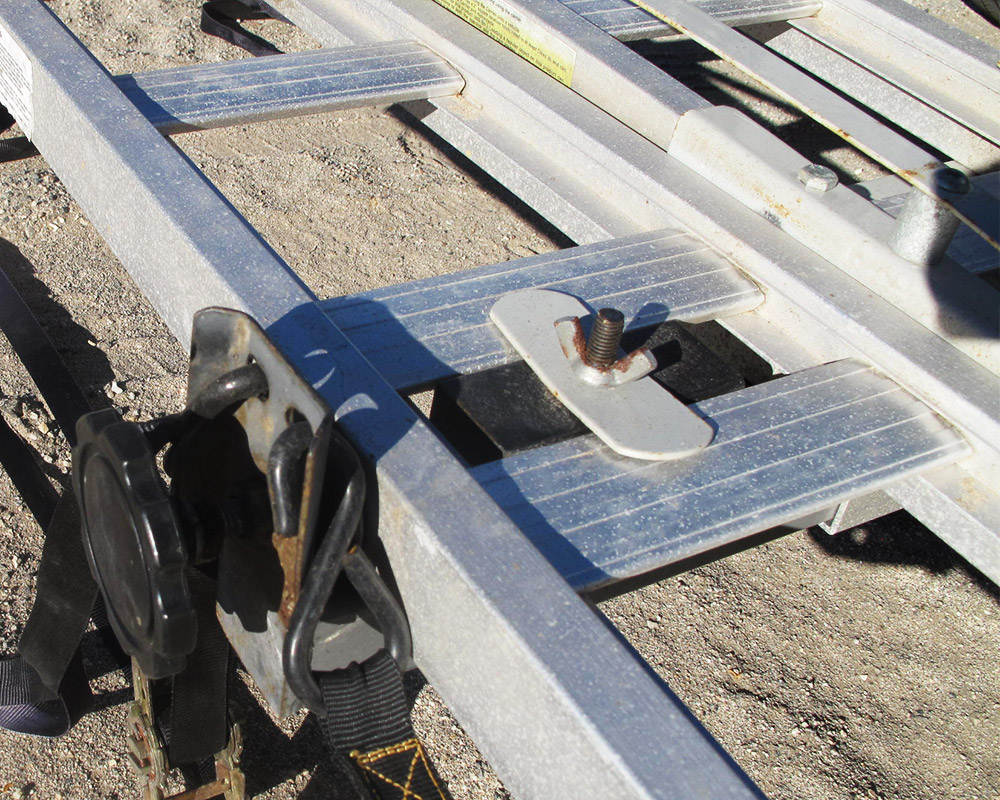
Harbor Freight’s house brand for hauling and towing accessories, Haul Master, offers this motorcycle carrier that attaches to your vehicle through a 2-inch, class III receiver. It is claimed to carry up to 400-pounds and is built with a steel main bar and an aluminum carrier and ramp extension. The carrier is 7-inches wide and has tie-down attachment points, wheel pins and a wheel clamp to secure the bike. The carrier requires assembly and tie-downs are not included.

"Haul Master offers this motorcycle carrier that attaches to your vehicle through a 2-inch, class III receiver"
How it works
- Assembly is pretty easy with parts of average looking quality.
- Secures a bike fine but is flexing and wobbly as a unit.
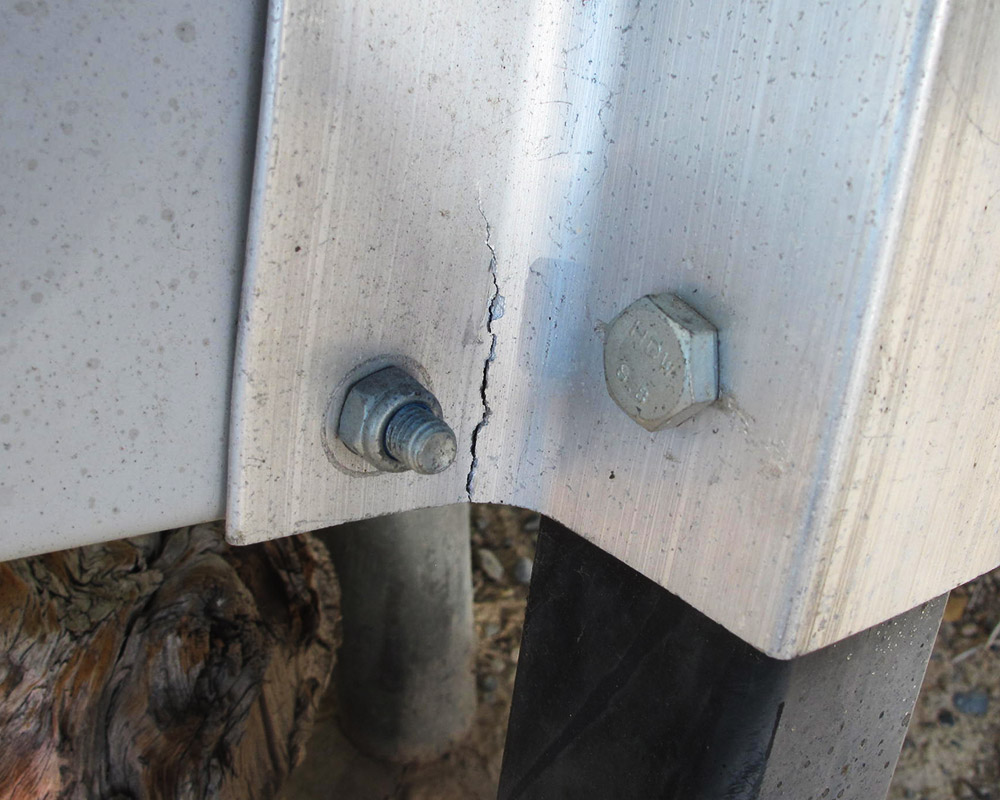
- Some of the aluminum is of inferior quality and our unit failed after a few months of normal use.
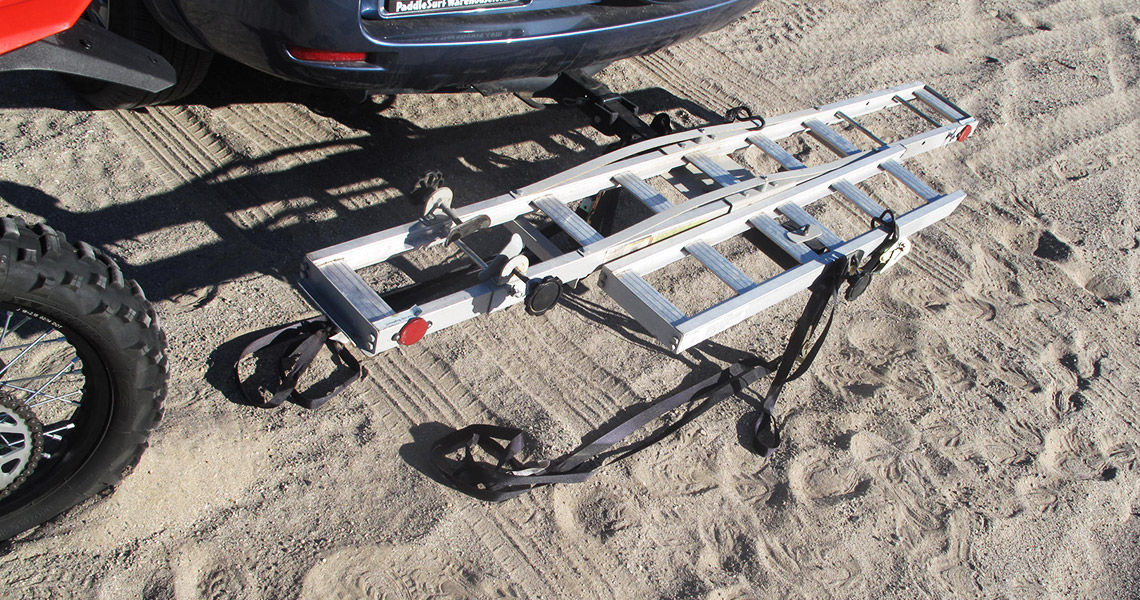
First of all, it is widely known that Harbor Freight products are notoriously low priced and of a quality that matches that price. This carrier can be had for close to $100 on sale and that prompted us to give it a try. The carrier weighs 47 pounds and appears to be built strong. Assembly takes about an hour, mostly organizing the nuts and bolts and identifying the parts and the places they go.
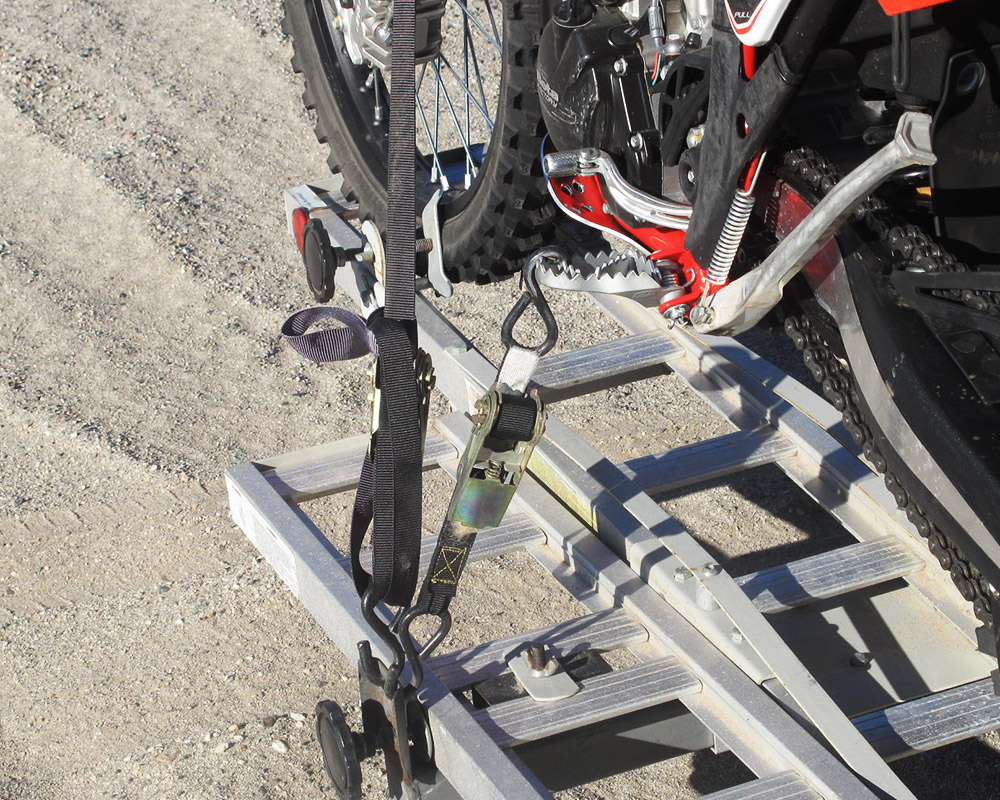
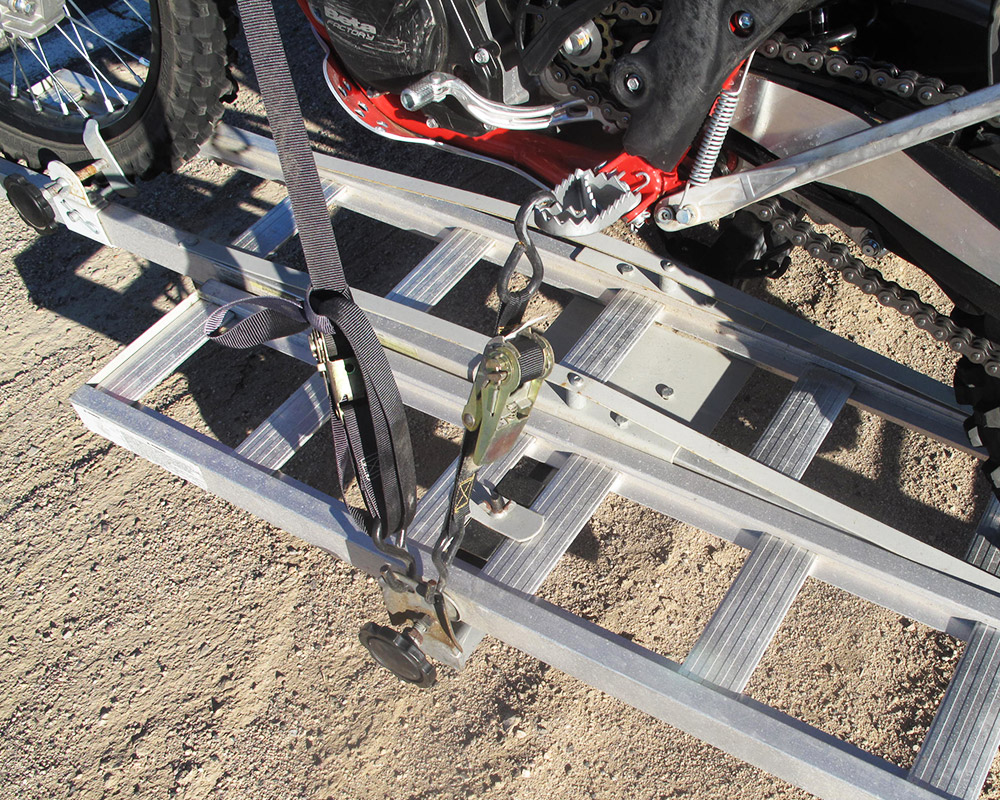
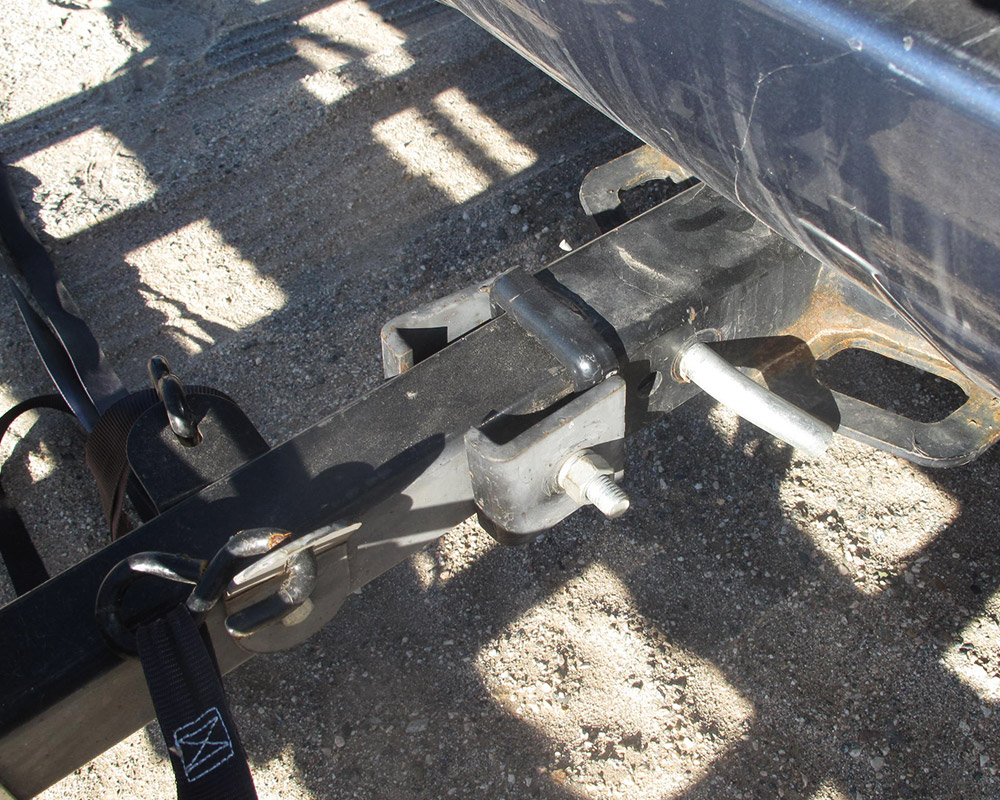
Everything goes right together, we attached it to a car and then our small issues started. The biggest (or smallest) was the size of the attachment points for tie downs, they were very small holes so ordinary sized tie down hooks could not fit through. We went and got smaller ratcheting straps with smaller hooks and used those. The hold-down for the loading ramp is very flimsy and always had us worried it would fly off, yet it never did. Attaching the carrier to the vehicle takes about five minutes, mostly tightening the stabilizer on the square receiver hitch channel.
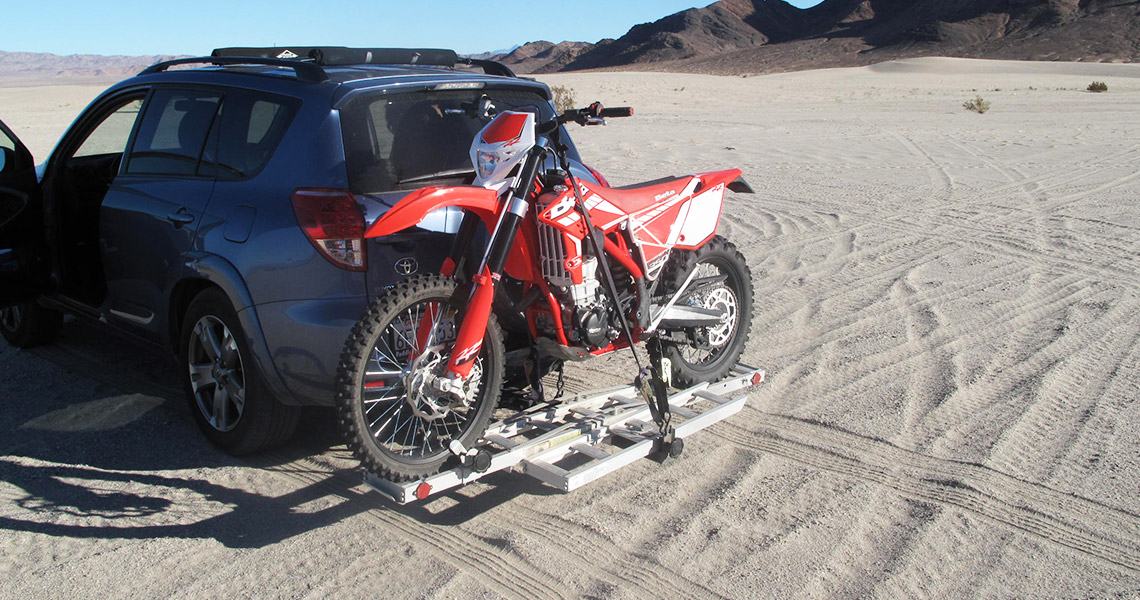
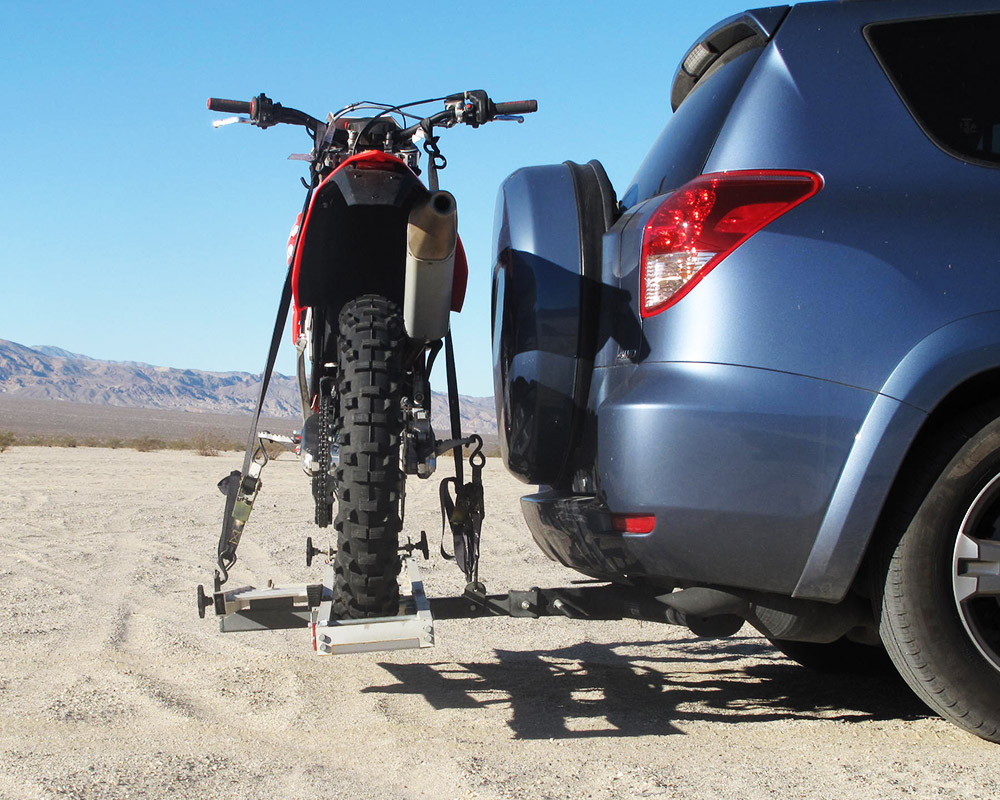
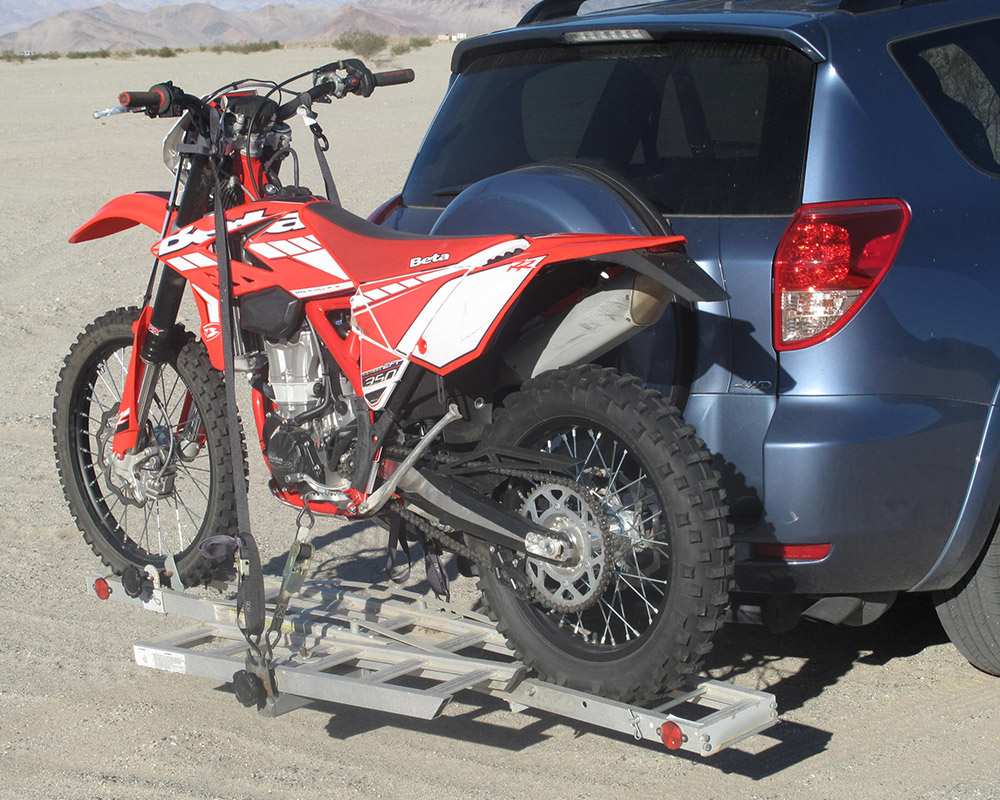
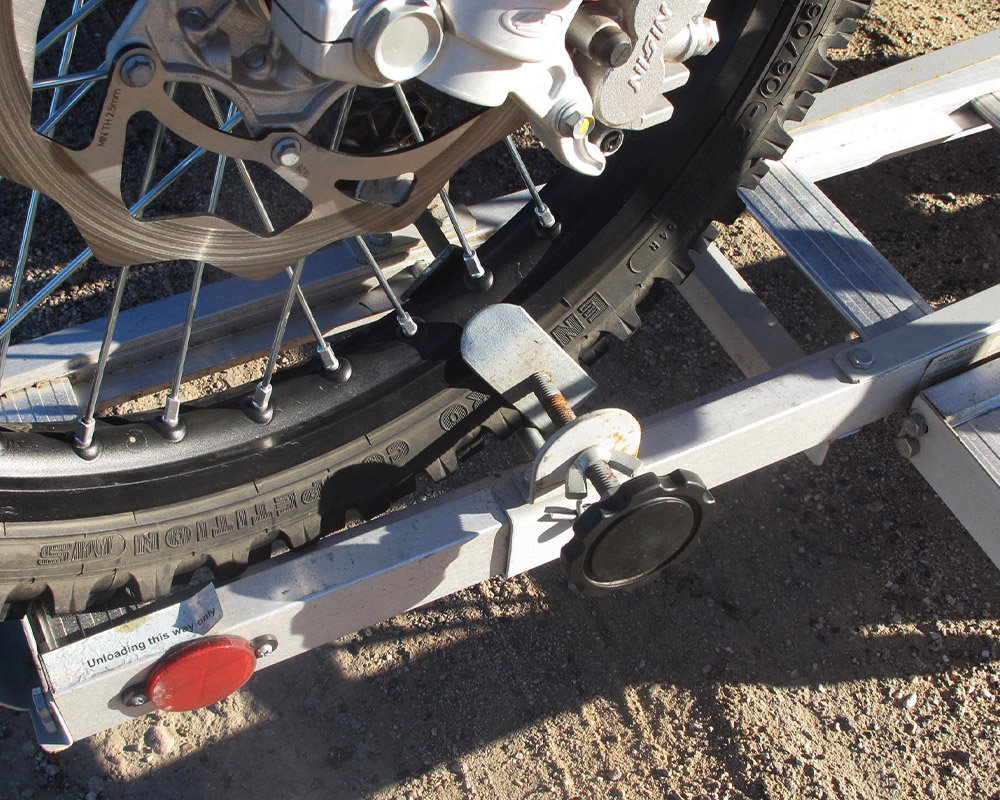
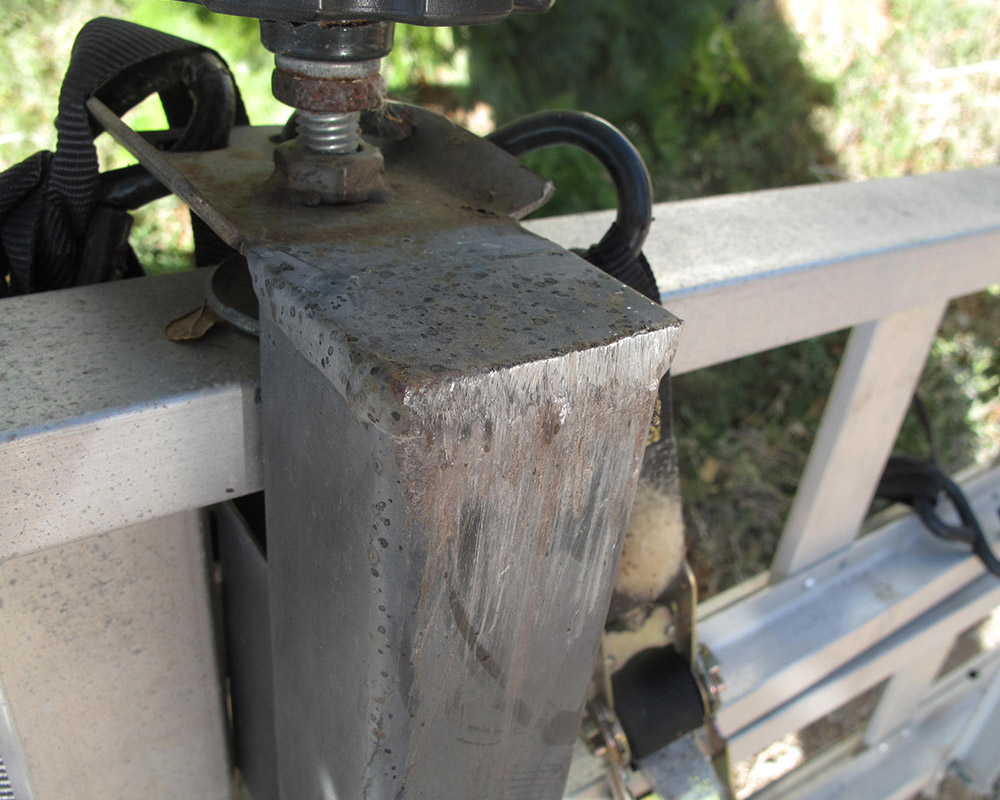
Bikes easily roll up the ramp (provided your hitch receiver isn't too high off the ground) onto the carrier and them the tires generally find a happy spot between the cross beams and near the pinch for the front wheel. Then you can pin the rear wheel in place or we preferred to use a strap around it as that was easier on the rim for safety. The instructions show the preferred way to attach the bike and we used a very similar method but also attached the bike by the footpegs as the strongest location to keep downforce on the motorcycle while on the carrier. Then we tied the handlebar to the tie down attachment points and tightened everything up. At this point you can see that the carrier is asking a lot of the aluminum plates attaching the carrier to the steel square tube holding everything. The steel straps that are there to stabilize the load are really taxed and bikes that are well under 400-pounds will pivot and sway on the carrier while being attached as snug as possible. There just isn't any way around this as there is only this single attachment to the vehicle and the carrier has a lot of leverage on the aluminum plate. The carrier’s square tube also has stabilization plates to minimize the sway in loose fitting receivers, achieved by tightening a bolt and pinching the receiver.
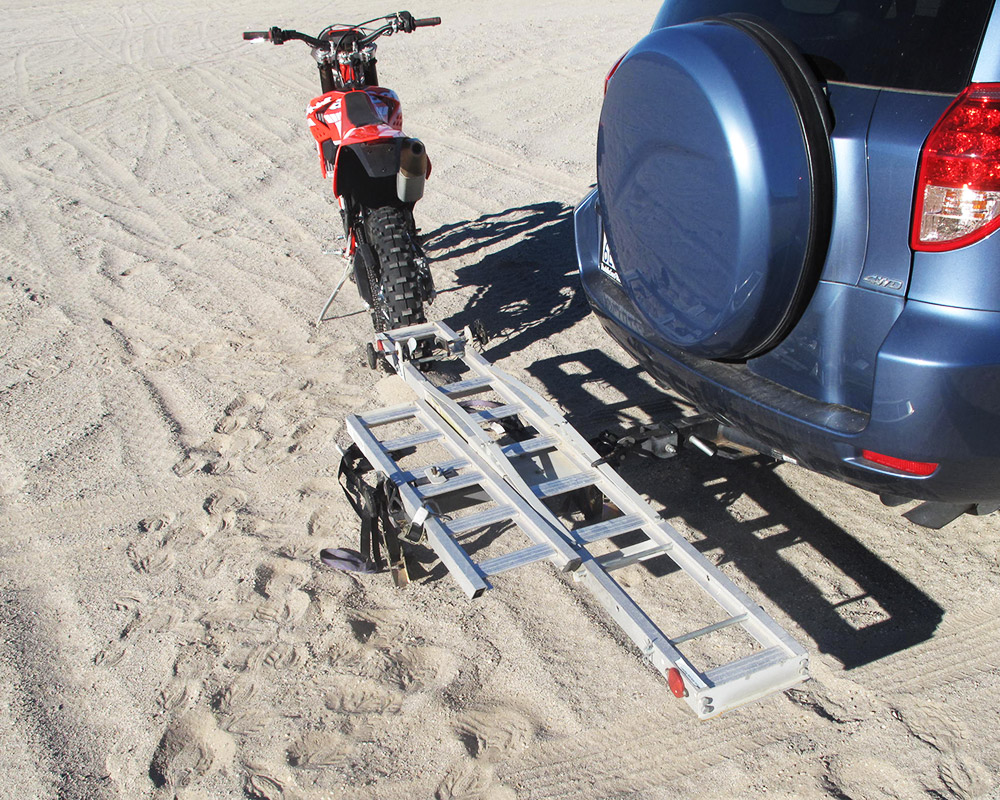
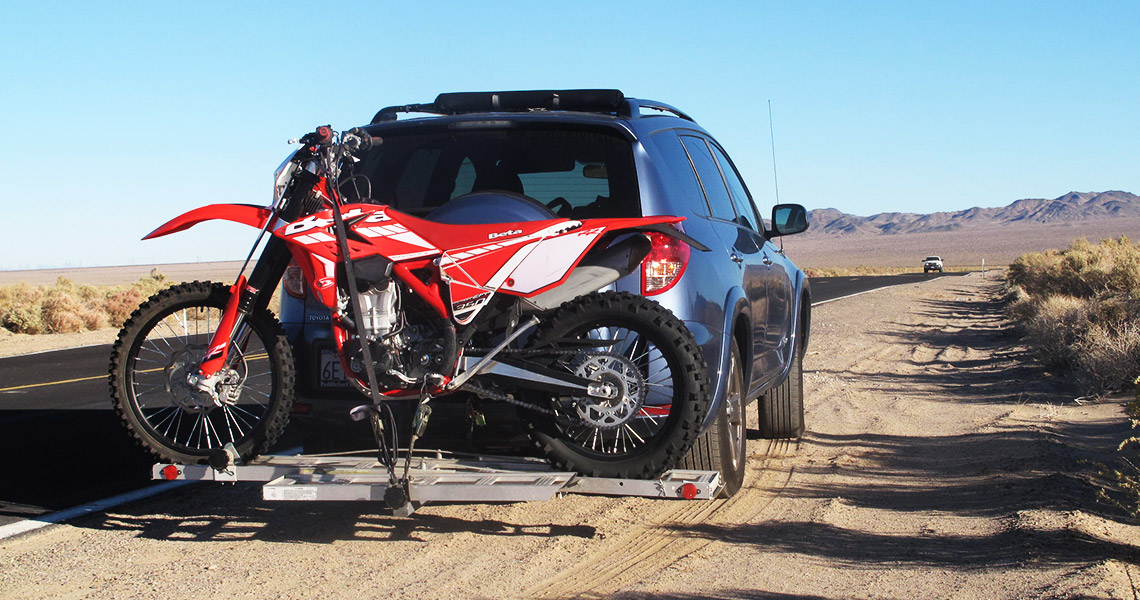
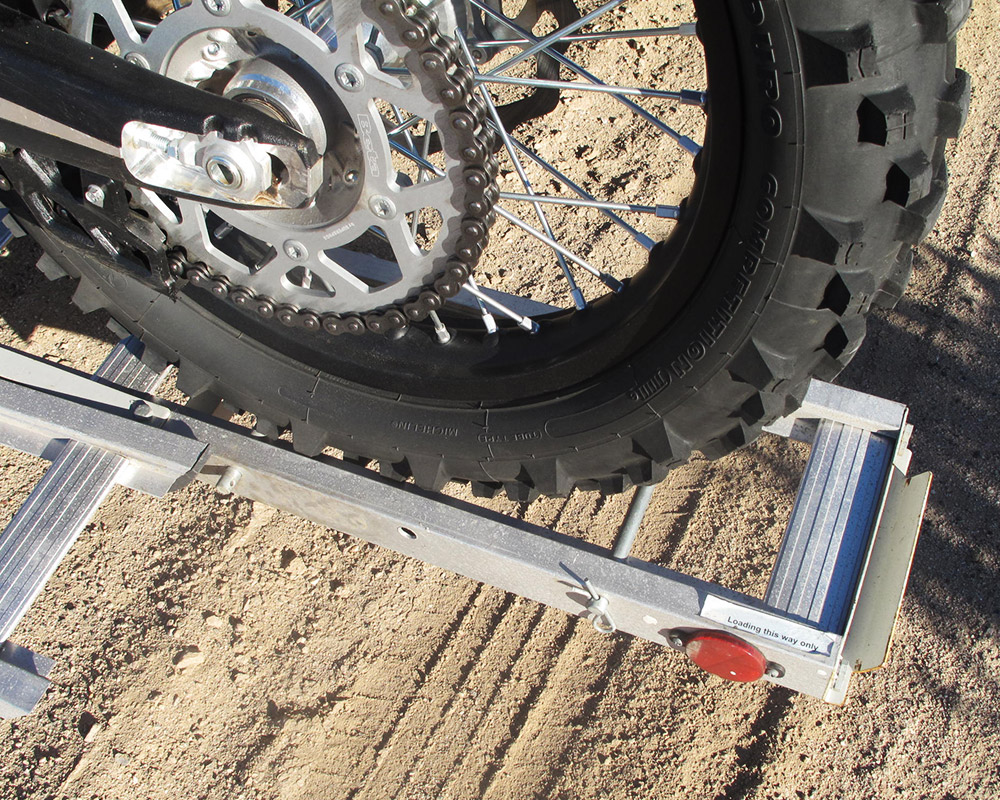
If the bike is all secured, it will still move the carrier around from flex and sway, but everything will stay attached if you secure it properly. It is a little more time consuming than just attaching a couple of tie downs in the bed of a truck. Considering if the bike falls off, it’s sliding down the road, this is time well spent. For unloading you attach the ramp to the front of the carrier and roll the bike off in a forward direction. Pretty simple.
In use there are a couple things to consider. First is whether your vehicle will like the additional weight that far out on the back. We tested it on a couple of trucks and a Toyota Rav 4 SUV. No matter the vehicle, if it wasn't a heavy duty truck, you could feel even a 250-pound bike on the back. On the Rav 4 the carrier drug on the ground going through ditches or over bumps on the road. It makes a nice spark shower at night and ugly noises any time it drug on the ground. Yet this isn't in any way a fault of the manufacturer. And in fact the carrier’s metal seemed to hold up to the scraping just fine. Where the serious problems occurred was after a few months of use the carrier’s main attachment from steel channel to aluminum started to fatigue and crack from the wobbling. It was enough for us to want to return the carrier but soon found out that we were just past the 90-day warranty period. Harbor Freight’s warning “We guarantee this product to be free from defects in materials and workmanship 90 days from the date of purchase. Limitations apply” needs to be taken seriously. Attempts to rectify this through Harbor Freight were met with exceedingly long wait times on customer service and finally a failed attempt to communicate with some of the people in the media relations, which was above what the regular customer might be able to do. So basically we are screwed and either have a new pile of scrap metal or will have to find some steel L-pieces to replace and reinforce the aluminum part that is failing. Having a bike fall off the back of this would instantly negate any money we saved versus a higher quality, more expensive hitch hauler.
In the end we proved a very old saying. You get what you pay for. But we sort of knew that going in, we were just hoping for more as we have found some gems of cost savings at Harbor Freight before.
Help support this site by purchasing through this link:
"In the end we proved a very old saying. You get what you pay for."


Leave a Reply
10 Responses to “Harbor Freight Haul Master Motorcycle Carrier”
Jimmy Lewis
A friend pointed us to this. Very similar cracking. https://www.youtube.com/watch?v=gIaWtTEdxBk&feature=youtu.be
Greg Yoder
2″ x 2″ x 1/8″ Steel L angle with Grade 8 Bolts. Problem solved.
Mark
But you can buy a MAC-400 for same price and it’s designed correctly without the hassle. I have nothing to gain by mentioning that carrier or that it’s sold by discountramps
Kevin Moore
Great write up. Now, I can stop being tempted. I’ve known “bolt together tends to twist a bit and loosen up. I was told the best thing to do with a HF trailer was bolt it up, make sure it tows well, then weld up the sections.
Rocking: Discount Ramps “rock lock” works great. After securing the bike, I take a second tie down from the handlebars, under the bumper, to the truck frame. Same on the other end. Stops the rocking.
Bouncing: I put a wood block between the ski plate and the carrier tray. I run the strap from the peg mount area under to the other peg mount. Using the tip of the peg could cause the peg to bend.
Swing weight: My first ramp was way out from my Suburban. I could feel it on that big beast cornering. Move in the carrier, drill a new hole, and they swing less.
I made my own bumper rack back in 1999 and a second in 2000 as few companies made them and the local welding shops were afraid of being sued.
Mark
I had the issue too: https://youtu.be/eJSmRQXRih4
Jimmy Lewis
Here’s a photo of the fix using 2 X 2 stock. And some more impending failures…
Jesse G
I went and spent $640 for the Ultimate MX hauler…dont be cheap by putting a $10K motorcyle on a $180 rack.
Chris
OK so I have had one of these for 2 years now. Despite a lot of the complaints i see about them I have never had any trouble. That being said there are a few things I do differently to alleviate some of the issues. First thing is as soon as you get home with it go through and tighten all the hardware. Nearly every bolt on the carrier is little more than finger tight from the factory. next up is pitch the el cheapo tie down loops that bolt on to the car side of the carrier. Take the inner strap from your handlebars down to the saftey chain loop and it make the bike ride much better. I have hauled my bike thousands of miles and it barely moves at all when strapped like this. Another thing that helps the bike ride a lot better is a fork brace (some call them seal savers even though they do nothing for saving seals). I have always just used a cut length of 2×4 to stick between the tire and fender. Also the stupid pins they give you to put through your rims can go in the trash bin as well. So in the end I use only 2 straps and 2 soft ties, same as I would use in a truck. It is very true you get what you pay for and honestly I bought this carrier with the intentions of only using it once on a 600 mile road trip because I didnt want to drag my trailer that far but, in the end I continued to use it for the next 2 years and it has been fine.
Ryan Evans
Me too! Mine has been awesome…
Max
I have the same carrier and on mine the two screw-in pieces that pinch either side of the front wheel is on the bottom of the carrier.. yours is on the top. In all the other pictures I’ve seen, this part is also on the bottom.
Also you have the frontwheel sitting on the pin that I thought was supposed to be removed and then slide back through the front wheel.
My only issue with this carrier is removing the bike. The place where the front wheel sits is too big and the wheel gets wedged in there really bad. I might drill two more holes and move that front wheel pin a tiny bit toward the rear of the bike and have the wheel sit on it, that way it doesn’t get seated so far in there and get jammed.